
Over the last couple of years, I've been putting Shelly devices into my house as part of my home automation journey. Although I've mainly used Shelly devices for automating lighting, they produce other devices such as an Energy Monitory (Shelly EM). So, with the recent energy price rises, I figured now was a good time to give the Shelly EM a go.
Home Assistant has supported energy management since 2021.8 of Home Assistant Core, so I'm interested to see how easily the Shelly EM will integrate with my existing Home Assistant setup.
The Shelly EM
The Shelly EM is an energy monitoring device which can use a current clamp to monitor the amount of energy being drawn from the power feed that the Shelly is monitoring.
The Shelly EM uses a current clamp (sold separately) to monitor the energy used by a given power feed. Shelly offers current clamps that are rated up to 50A or 120A. As a result, a Shelly EM can typically be used to monitor the power consumption of an individual circuit or the power draw of an entire house.
As our main fuse in the meter cupboard is rated for 80A, I opted for the 120A version.

Here's a quick summary of some of the features that the Shelly has to offer:
- Fully Wireless – No Hub Required
The Shelly connects directly to your WiFi network without needing a hub and can be controlled via the Shelly app, and connected to the free Shelly Cloud for remote control. - Overconsumption and over energy protection
The Shelly EM can provide a neutral and a switched output feed which means the device can be integrated with a contactor to turn a circuit or appliance on or off in the case of overconsumption. - Dual Power Metering
The Shelly EM can monitor two different power feeds simultaneously. - Built-in Energy History
365 day built-in energy history. - Integration Support
Supports integration with Amazon Alexa and Google Assistant and can integrate with home automation systems using MQTT and HTTP APIs.
Installing the Shelly EM
I wanted to use the Shelly EM to monitor the total power consumption of the house, which will involve installing the Shelly EM on the main tails that come in from the meter cupboard into the consumer unit.
Disclaimer: Before I continue, remember that working with electricity is dangerous, and it can kill. This blog post is designed to illustrate the capabilities of the Shelly EM – it is not an installation guide. Follow the official Shelly instructions and use a qualified electrician.
Fortunately for me, where the meter tails come into the house, they go straight up into a loft space that has access to power and sockets. So I've installed the Shelly EM to be powered by a standard plug:

Before installing the Shelly in situ, I powered up the device so that I could use the Shelly app to connect the device to my network ahead of time.
As you can see from the above photo, I'm using a single current clamp to monitor the incoming live feed. Our meter tails are not coloured, so figuring out which was the right feed to monitor and which way round to place the current clamp took some trial and error. However, once I got positive (rather than negative) readings within the app, I knew the device was installed just how I needed it.
Below is the full wiring diagram for the Shelly EM:
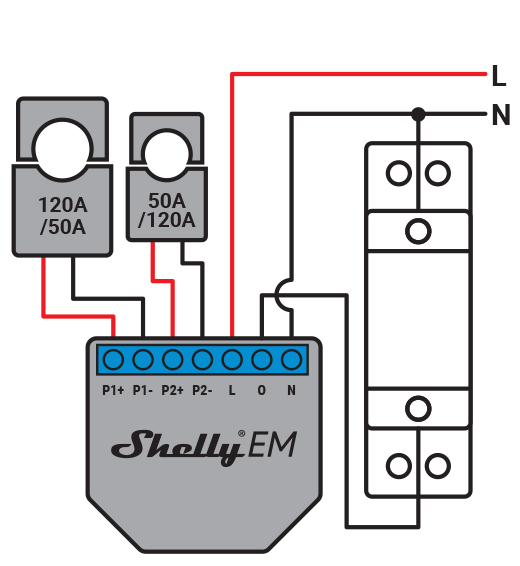
This diagram shows the most complete setup – using two current clamps to monitor two feeds and controlling a contactor. In my case, I just want to monitor a single feed as you can see in the picture above. With the single current clamp installed, it is now just a case of powering the device.

Integrating the Shelly EM with Home Assistant
Time to get this thing hooked up into Home Assistant! Open up Settings > Devices & Services, and under Integrations Click + Add Integration.
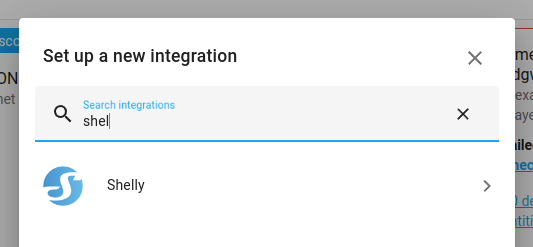
Select Shelly from the list of integrations:
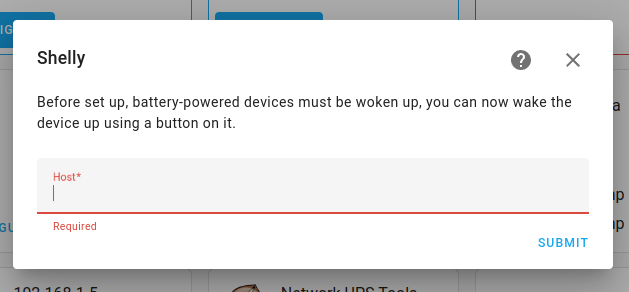
Select the device from the list of devices or provide the IP address of the Shelly if Home Assistant hasn't automaticlly discovered the device:
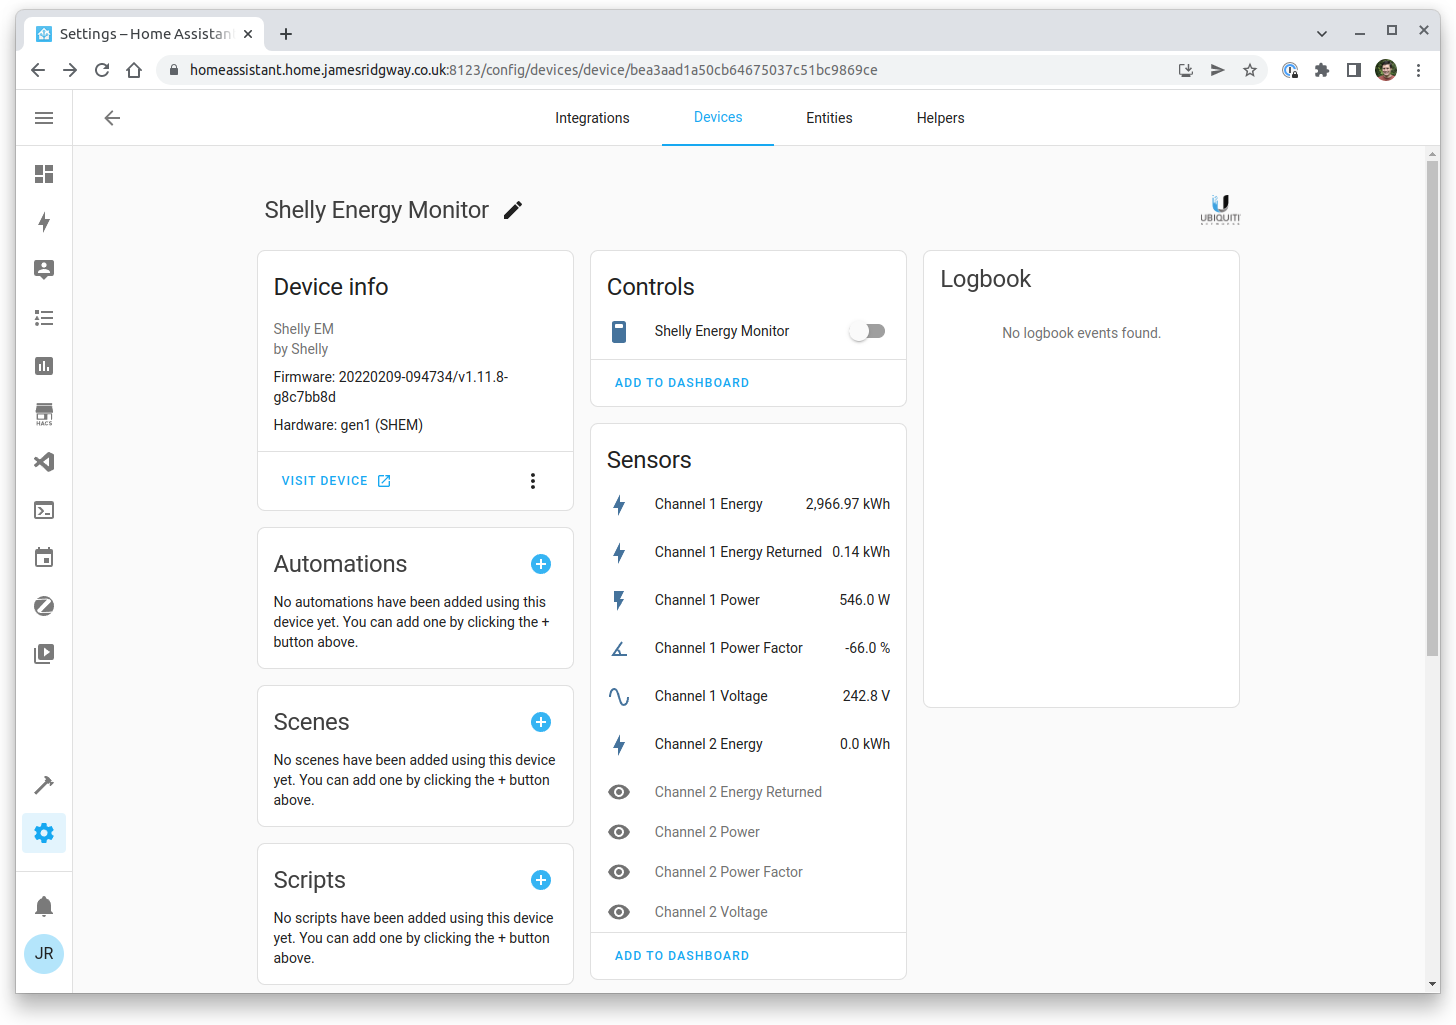
That's all that's needed to add the Shelly EM into Home Assistant. If you now search for the Shelly under the Devices section of Home Assistant, you should see something that looks like this:
Before diving into the new Energy section of Home Assistant, we'll want a sensor to track our unit rate for eleectricity. Unfortunately, at the point of writing, Home Assistant doesn't support standing charges – we'll come back to a solution for this later.
I will track the current unit rate for electricity via a sensor. This will give me the option in the future to load this value in dynamically if I want to.
In my sensors.yaml file I have created the following sensor. My current unit rate for electricity is 27.35p per kWh.
- platform: template
sensors:
electricity_kwh_unit_price:
friendly_name_template: "Electricity Unit Price"
value_template: "0.2735"
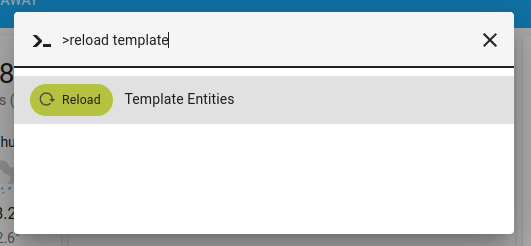
unit_of_measurement: "£/kWh"For the new sensor to start appearing in Home Assistant, Template Entities will need to be reloaded. Press c to bring up the Command Pallette and select Reload Template Entities.
Before going any further, check that your currency settings are set correctly under Settings > System > General.
Open up the Energy section of Home Assistant:
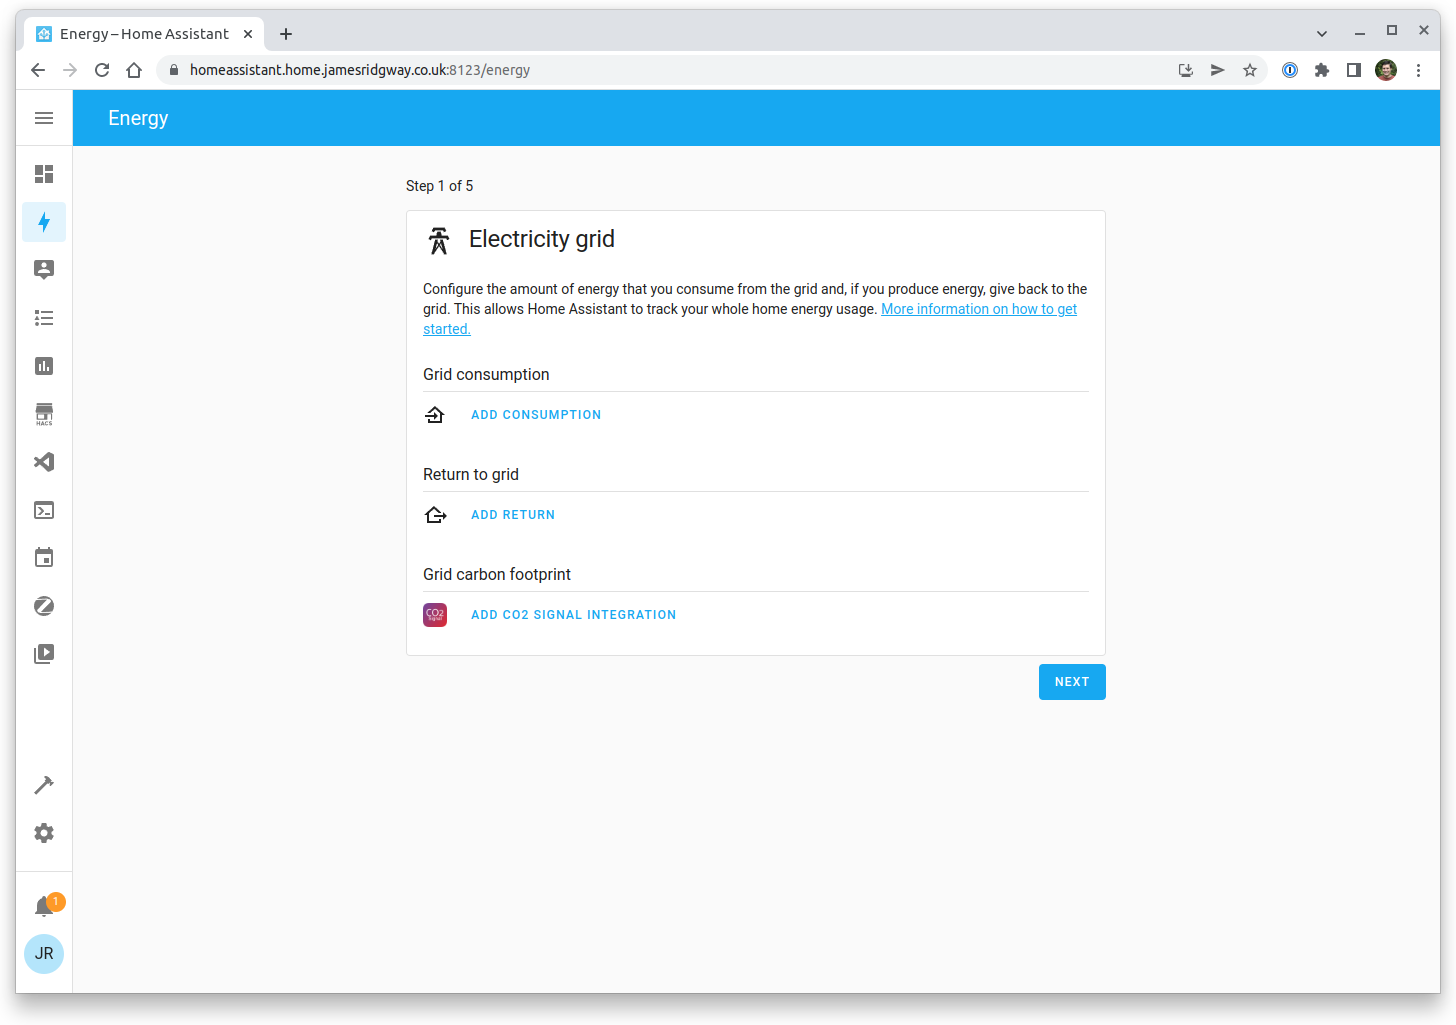
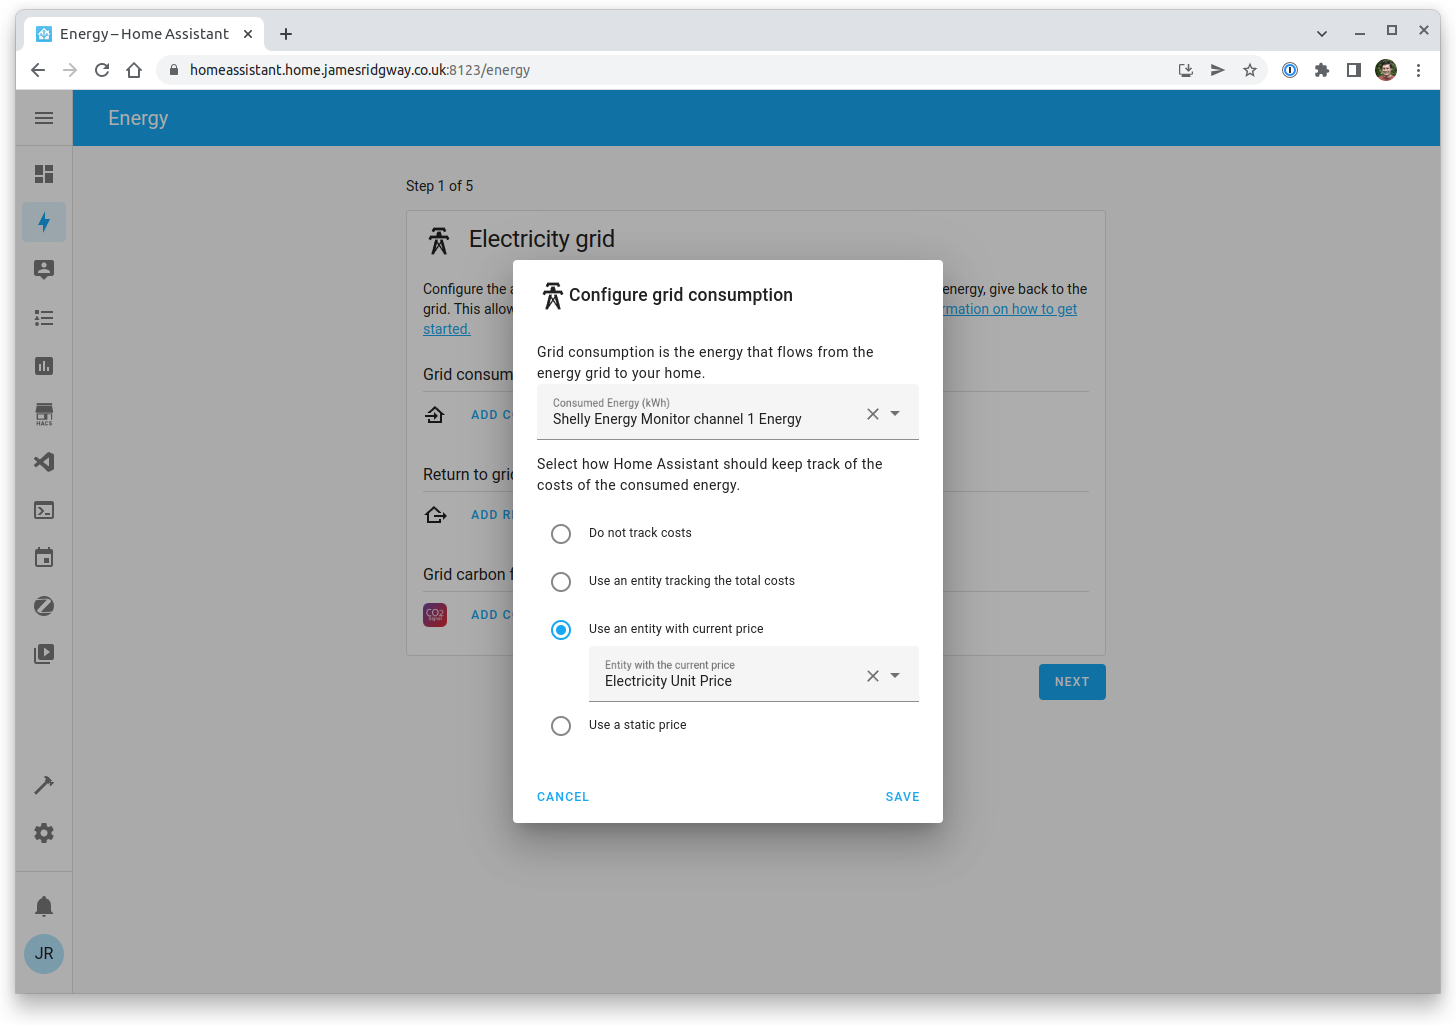
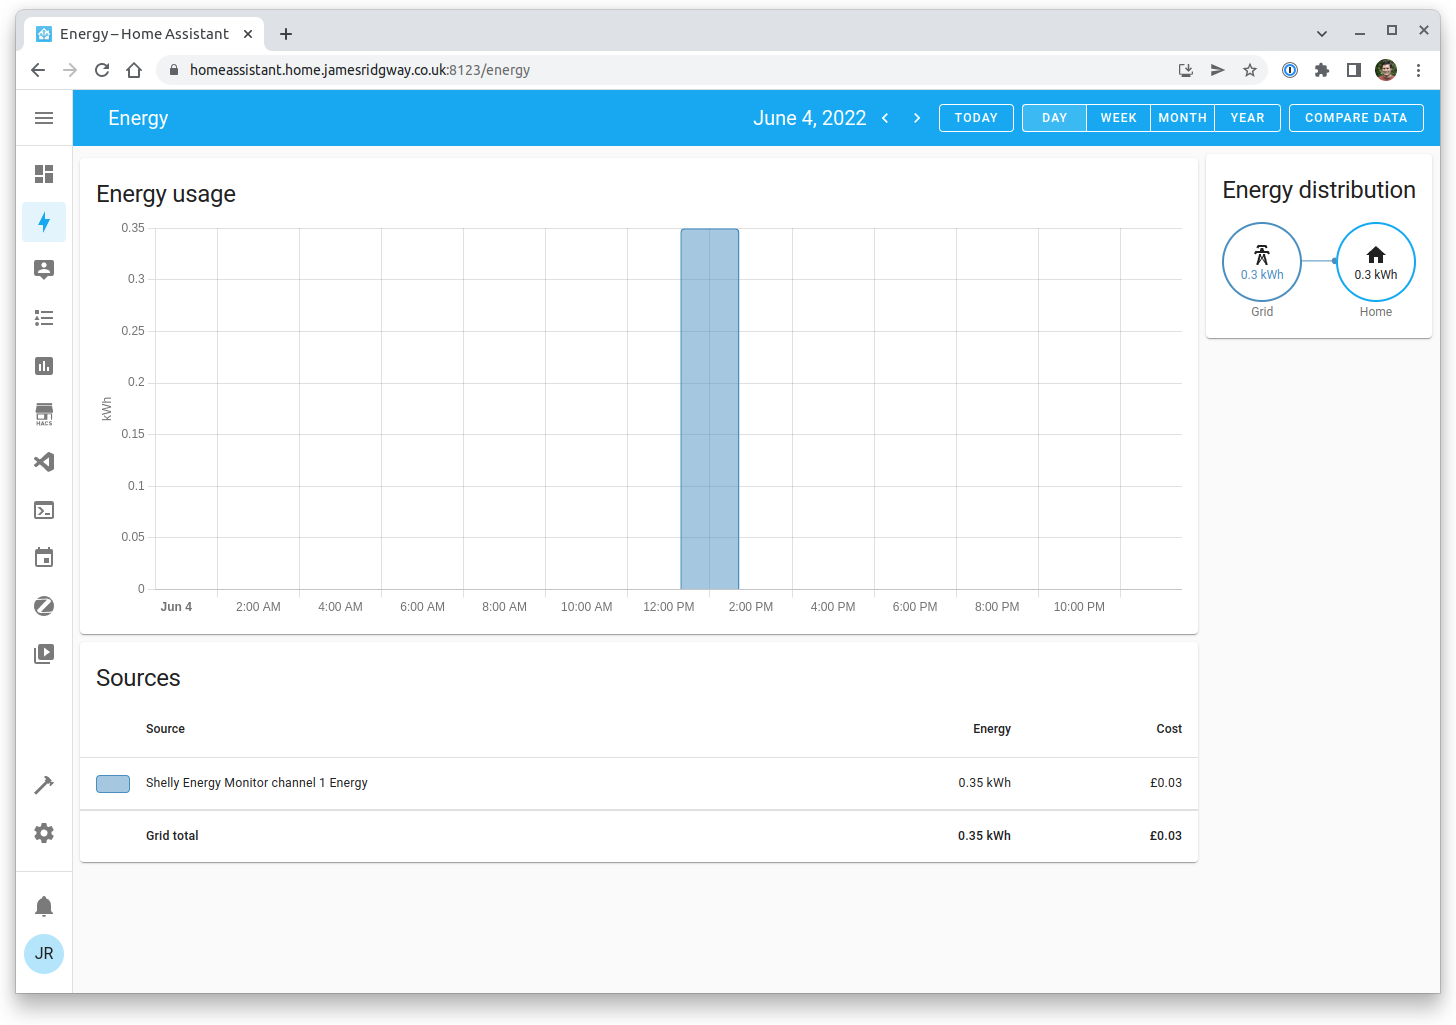
The Shelly EM is monitoring our grid consumption, so click Add Consumption. Select the correct Shelly energy channel and the entity that is providing the price:
We can now progress through the wizard. I'm not going to add any other devices at this stage so I am goign to skip through the next 4 screens by pressing Next. Finally, click Show Me My Energy Dashboard on the last screen of the wizard.
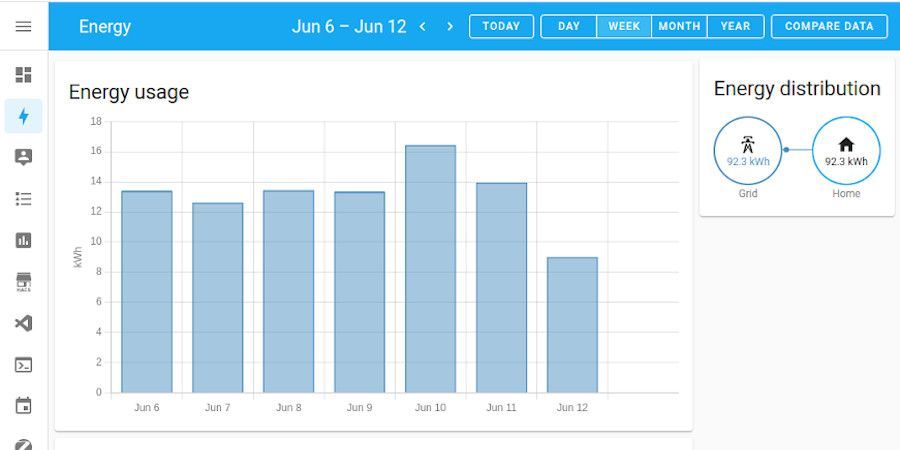
It might take a few minutes for data to start coming through but you should start to see the energy dashboard populating with your current usage:
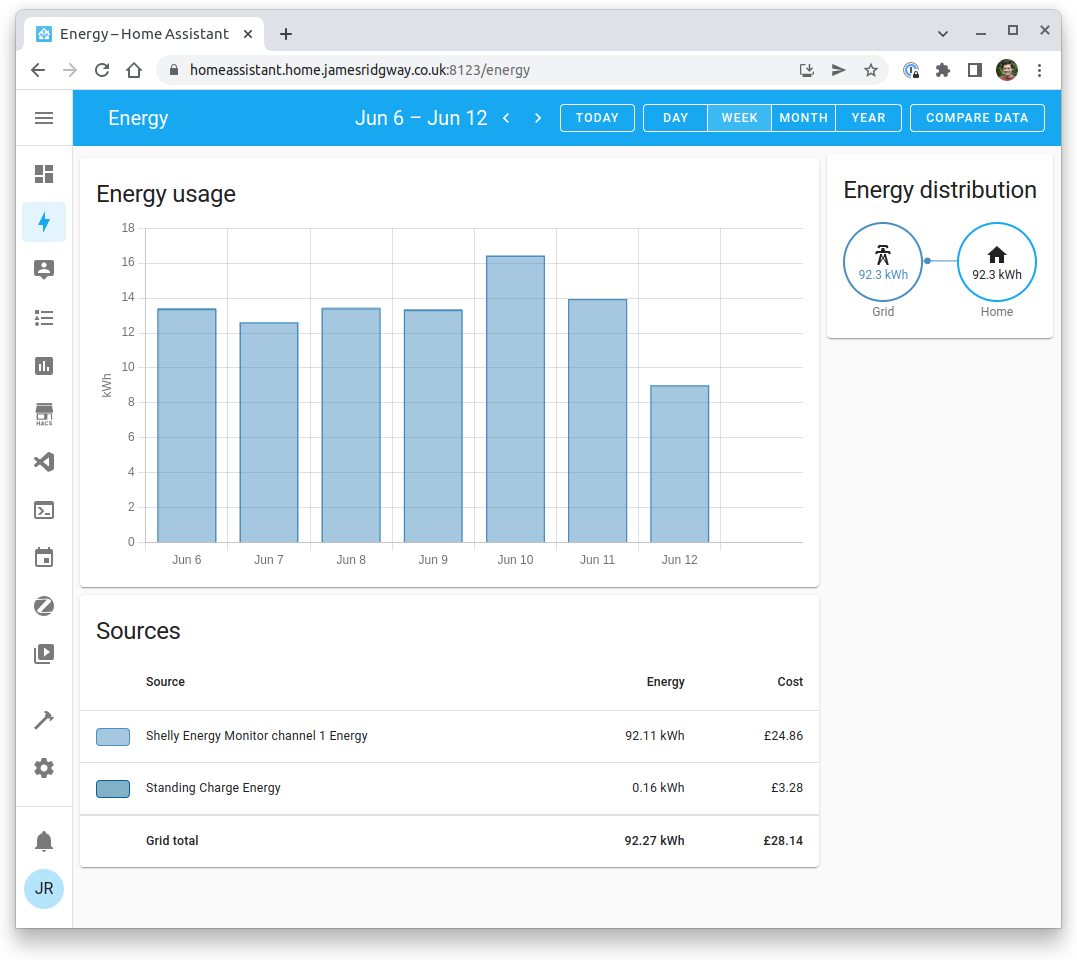
Standing Charges
In the UK, it's fairly common to have a unit rate (price per kWh), and a standing charge (a fixed daily cost).
At the time I'm writing this post, there is an open feature request for supporting a standing charge – Energy: Add fixed daily cost.
Although this isn't supported, a post on the Home Assistant community discusses exactly this, and in the replies a community member going by the username of muzzak provides the following workaround.
The premise behind the workaround is quite simple – use a separate energy sensor and price entity to simulate the standing charge being added over the course of the day. This is slightly imperfect, as the energy sensor will have to consume some amount of energy. However, this is mitigated by having the energy sensor increment by 1Wh every hour, which is the smallest possible unit and overall will have a negligible impact on your actual energy consumption.
I have re-visited my sensors.yaml file to add in a new sensor for the standing charge, so I now have:
- platform: template
  sensors:
    electricity_kwh_unit_price:
      friendly_name_template: "Electricity Unit Price"
      value_template: "0.2735"
      unit_of_measurement: "GBP/kWh"
    electricity_standing_charge_price:
      friendly_name_template: "Electricity Standing Charge Price"
      value_template: "20.1083" # (£0.4826 per day * 1000) / 24
      unit_of_measurement: "GBP/kWh"
sensors.yamlBecause this workaround is designed to increment energy consumption by 1Wh every hour, your "per day" service charge needs to be multiplied by 1000 and then divided by 24 to give the charge in the correct units for this situation.
The next step is to add a sensor to our templates.yaml file. This sensor will track the number of hours elapsed since we've introduced the sensor:
- sensor:
  - name: "Standing Charge Energy"
    unit_of_measurement: "kWh"
    device_class: energy
    state_class: total_increasing
    state: >-
      {{ (((now().timestamp() / 3600) - 459543) | int) / 1000}}
    attributes:
      last_reset: '1970-01-01T00:00:00+00:00'
This sensor will increment by 1Wh from the time the sensor was introduced. The current epoch timestamp (in seconds) is converted to hours. An offset of 459543 is then deducted before dividing by 1000 so that the increment is 1Wh rather than 1kWh.
First, the offset you will need to use is the number of hours since epoch. So use Epoch Converter or some other tool to get the epoch seconds at the point in time you introduce this sensor and divide that by 3600 to give you the number of hours since the epoch.
The final part of this process is to add our sensor to the Energy dashboard. Open up Settings > Dashboards and click on the Energy dashboard.

Just as before, add the energy sensor that we created and select the price entity.
Conclusion
There we go! That's the Shelly EM giving real time energy usage and consumption cost monitoring in Home Assistant.
