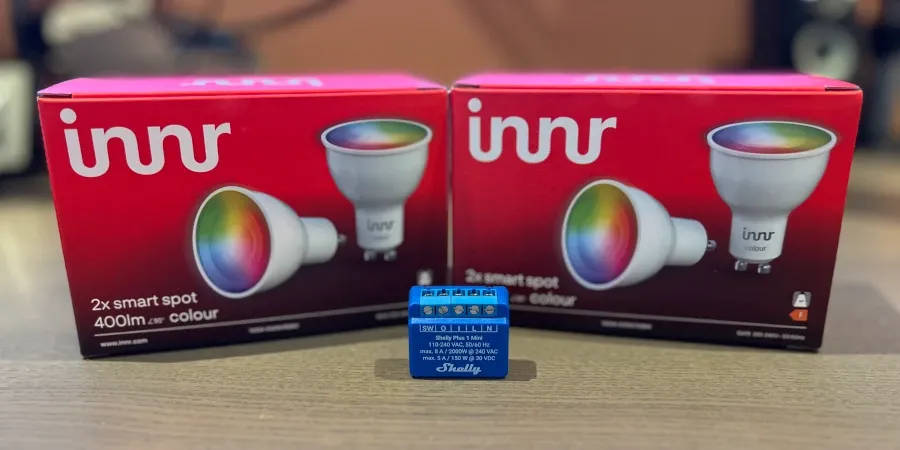
Throughout the house, nearly every single light is controlled by a Shelly. Last year, we installed a UniFi G4 Video Doorbell, and whilst we were having this fitted, it made sense to replace some of the outside light fittings and install some Shelly Duo GU10 RGBW bulbs.
Out of the six Shelly Duo GU10 RGBW installed a year ago, only 3 of them still work. As we head into autumn and the days start to get shorter, I want to replace these so that all outside lights can be returned to a working state. However, given the number of bulbs that have failed in the last year, I'm considering a different approach.
By contrast, we have two Innr GU10 Zigbee bulbs in our ensuite bathroom that were installed nearly three years ago, and are still going strong. The lights in the ensuite are controlled via a Shelly i3 which operates more as a remote switch/trigger rather than a relay. An i3 was used for the ensuite due to space limitations; however, with the outdoor lights, there is space to use a normal Shelly relay.
The Escalator Principle
In my original blog post on using a Shelly to make a traditional light switch smart, I mentioned the Escalator Principle:
If an escalator stops working for whatever reason, it still functions as stairs.
I have applied this principle where I can to everything that I have done smart home-wise.
The great thing about using a Shelly with a light switch is that even if the WiFi goes down or there is an issue with Home Assistant, you can still use the light switch like a normal light switch.
I have been conscious of avoiding using smart light bulbs with a regular light switch – because the risk here is that someone will turn the light off at the wall switch, which will cut power to the bulb and prevent it from being used in automation until the wall switch is turned on again
In the case of the ensuite, the bulbs are powered by a permanent live feed, and the Shelly i3 toggles if the lights are on or off via Home Assistant. This means that someone can use the wall switch to turn the bulbs on or off, without cutting power to the bulbs. The downside, however, is that the i3 depends on Home Assistant and the WiFi network to control the lights, violating the escalator principle.
Detached Switch
With the Shelly Duo GU10s, I never solved the problem of preventing someone from turning off the bulbs at the light switch. The light switch functioned just like a regular light switch because I never got around to a smarter solution, such as using a Shelly relay with the switch. This meant that if someone turned off the wall switch, then Home Assistant would be unable to control the lights via automation.
With the move to the Innr GU10 Zigbee bulbs, I want to solve this, but it will come at the tradeoff that to be able to use the outdoor lights, I will be dependent on Home Assistant and the WiFi network working, which is a low-risk tradeoff, especially for outdoor lights – having the lights in the house continue to function even in the event of a network or Home Assistant issue is much more important.
So, what is a detached switch?
Most Shelly relays used for lighting can take an input (e.g. a light switch) and have a relay that can control an output (e.g. provide power to a switched live feed).
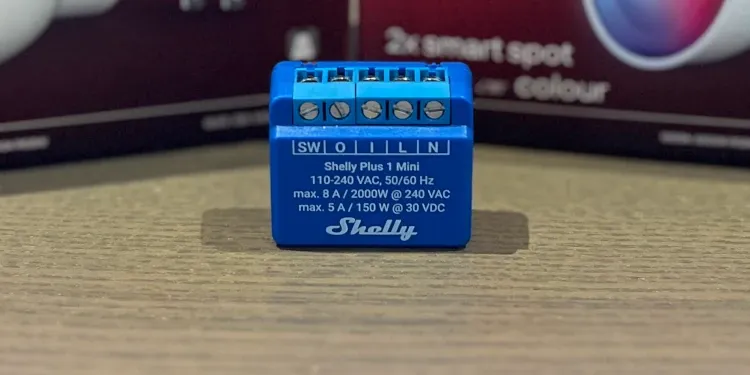
The input (switch) and output (relay) are coupled by default – changing the input/switch will toggle the relay. In most use cases, this is exactly the behaviour that you want.
A Shelly can also operate in "Detached Switch" mode, meaning the switch is separate from the relay. This means that I will be able to use an automation in Home Assistant to detect when the switch is toggled and to turn the Innr bulbs on/off without cutting power to them. As a result, even if someone uses the wall switch to turn the lights off, I will still be able to control them via automation.
This would have a minor drawback that if the WiFi network or Home Assistant had an issue I would temporarily lose the ability to use the wall switch to turn on or off the outside lights.
I will be installing a Shelly Plus 1 Mini behind the wall switch that is used to turn on the garden lights. The goal is to have the Shelly provide the lights with permanent power, but allow the switch to turn the lights on or off. By having the switch work in this way, it will prevent power from being cut to the lights even when the wall switch is used to turn them off. This will ensure that automation can always interact with the lights.
Once the Innr GU10 bulbs and the Shelly Plus 1 Mini is installed, we'll need to configure the Shelly and Home Assistant for our new setup.
Configuring the Output Type
Setting up a Shelly is usually a straightforward process of adding it to the network and adding the IP address of the new Shelly into the Home Assistant integration for Shelly.
However, we'll need to do a small configuration change on top of this because we want to use the Shelly as a detached switch.
Once your Shelly is connected to the network, start by navigating to the Shelly's web interface:
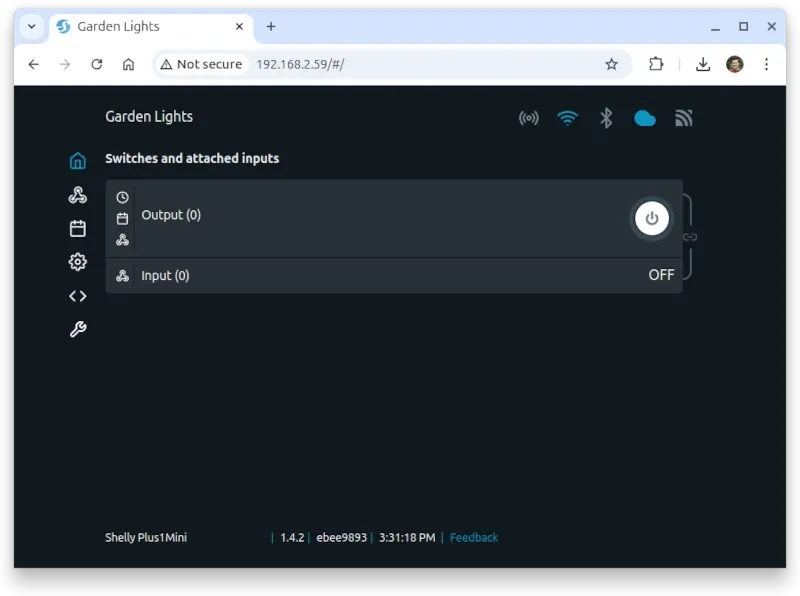
Click on the "Input (0)":
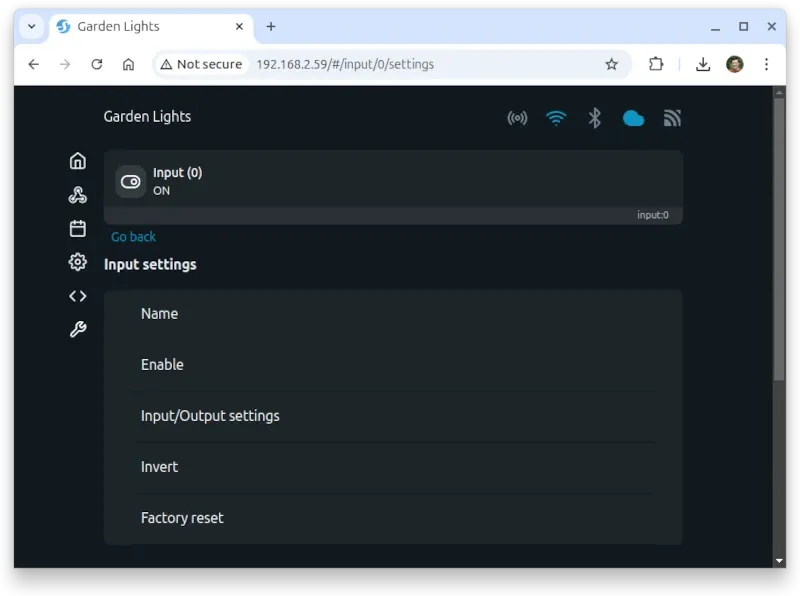
Select "Input/Output settings" from the input settings menu:
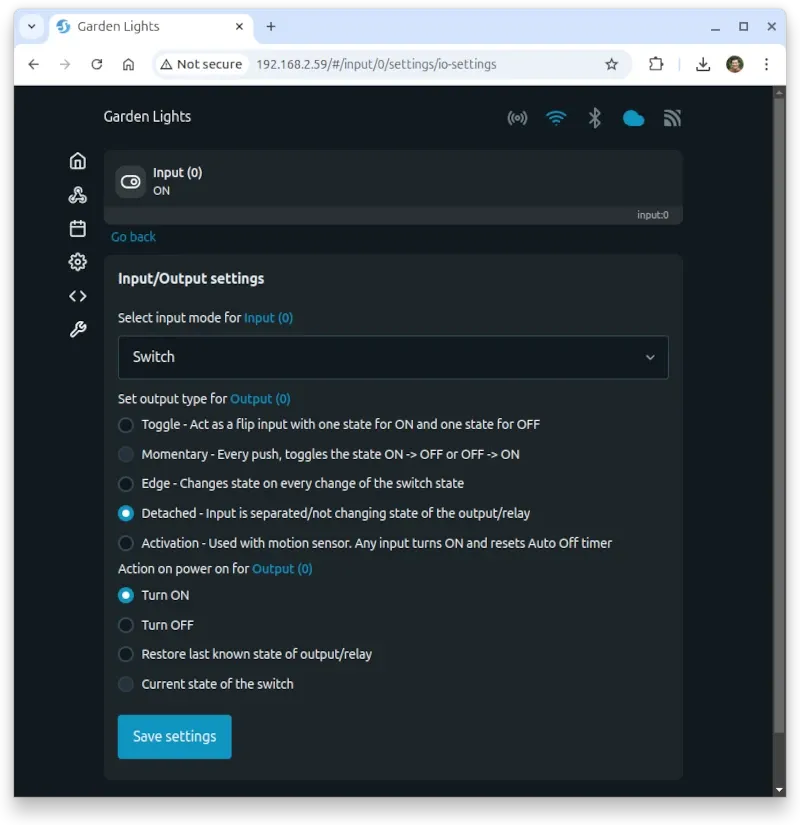
In the above settings, we will want to change the output type to "Detached" – this will ensure that the input (switch) does not directly cause a state change for the output/relay.
Additionally, because I want to use Home Assistant to control the state of the bulbs, I have set "Actions on power on for Output (0)" to "Turn ON". This will ensure that if the Shelly restarts (either due to a firmware update or a power cut), power to the bulbs will be restored.
Innr Bulbs
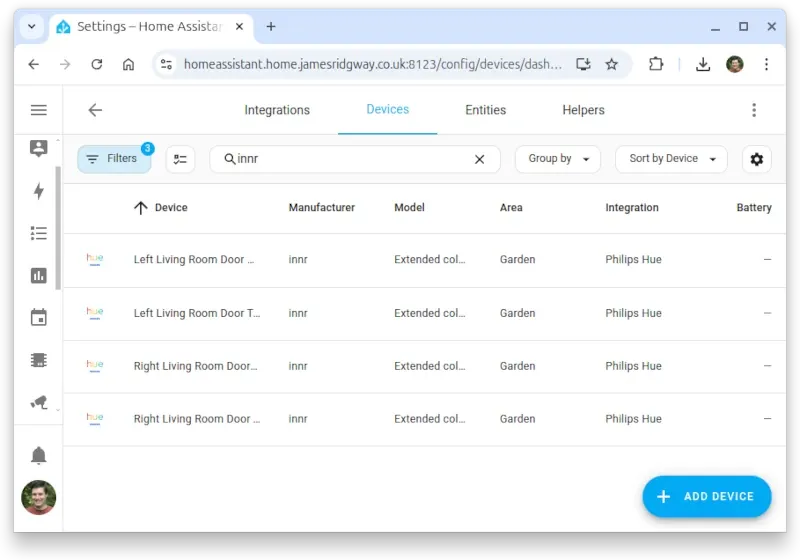
I currently control all of the Philips Hue and Innr lights we have via the Philips Hue hub and the Philips Hue integration built into Home Assistant. By using the Philips Hue app on my phone to add the new lights to our Philips Hue Bridge, Home Assistant has automatically added the new lights:
Home Assistant Automation
The wall switch for the garden lights is now connected to the Shelly input. I now need to create an automation that will toggle the state of the lights whenever the wall switch is used.
With the Shelly operating in detached switch mode, we will need to watch the input toggle state. By default, this is disabled on the device and will need to be enabled.
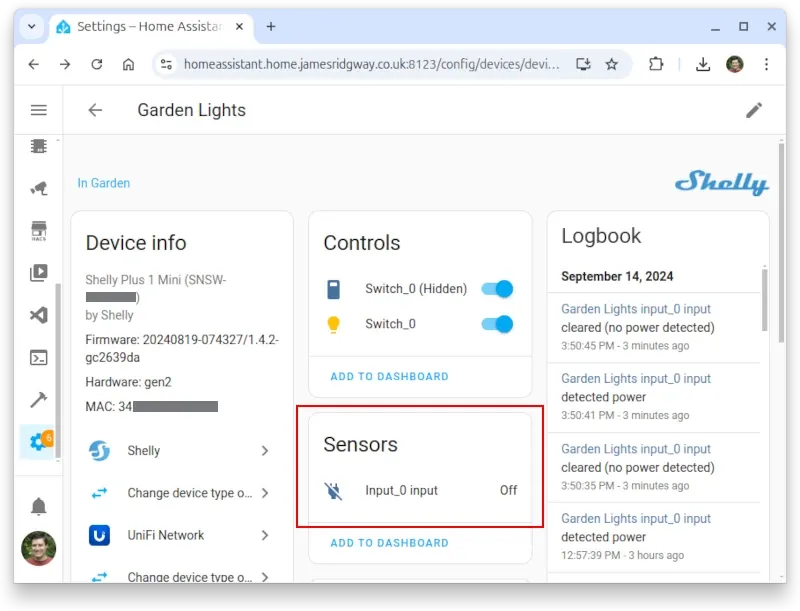
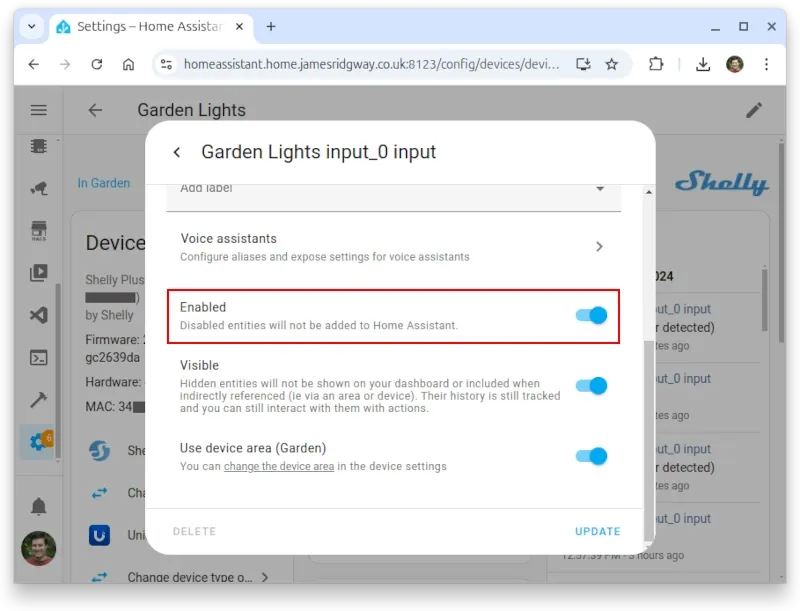
By clicking on the sensor input, you will be able to use the toggle to enable the input sensor:
We will now be able to define our automation, which will monitor the state of the input:
alias: "Garden Lights - Living Room Switch"
description: "Garden Lights - Living Room Switch"
mode: single
trigger:
  - platform: state
    entity_id:
      - binary_sensor.shelly1mini_garden_light_input_0_input
condition: []
action:
  - action: light.toggle
    metadata: {}
    data: {}
    target:
      entity_id: light.garden_lights
This automation will allow the switch to be used to turn the lights on and off, without cutting power to the lights and preventing the lights from being controlled by automations.
Over time, I expect that I will add more automation that will be responsible for turning the garden lights on and off based on the time of day and whether or not we're in the garden.
Conclusion
Using a Shelly as a detached switch for controlling smart bulbs is a great way to ensure that you can still use the wall switch to turn the lights on and off whilst maintaining power to the bulbs so that automations can still toggle them on and off.
This isn't a "perfect solution", as it violates the escalator principle. However, it is very close to perfect, and I can tolerate that out of all the automation and smart technology we have in the house, if Home Assistant or the WiFi goes down, the only things we won't be able to use normally, are the ensuite or garden lights.
,


