
When I started my home automation journey just over two years ago, I did so with the vision of having some kind of wall-mounted dashboard to control everything in the house.
As I've grown the automation in the house over the last few years, I've now reached a point of critical mass with automations in the house that makes creating a wall-mounted dashboard worth the effort!
Where to place a dashboard?
The first thing to decide was where would be a good place to put a dashboard. Like most homes, our kitchen plays an essential role in daily life. Additionally, the kitchen is right by the front door, so accessing the dashboard on the way in or out of the house will also be convenient.
We're due to decorate the kitchen at some point, so now would be a good time to drill holes and make a bit of a mess before we decorate.
Picking The Tech
The next decision was to decide what technology I wanted to use for the dashboard.
My requirements were as follows:
- I want the dashboard to be wall-mounted
- It should be touchscreen controllable
- It needs to have a slim form factor and be unobtrusive
One consideration was using a touchscreen monitor with a Raspberry Pi or NUC form factor computer. However, this wouldn't easily fit the "slim form factor" requirement as I would need to find somewhere to hide the Raspberry Pi or NUC box.
The other consideration was to wall mount a tablet; however, a good option for wall mounting wasn't immediately obvious.
After a bit of research and finding some suitable options for wall-mounting, I settled on using a tablet for the following reasons:
- Slim form-factor
- "Kiosk" apps exist that allow the tablet to be locked down to operate in a kiosk mode
- Most kiosk apps have functionality such as using the camera to wake the tablet screen upon motion
I ruled out using an iPad early in the process, mainly due to the price point. My research also showed that kiosk apps for Android were typically more powerful and feature-rich than their iOS counterparts. This is likely due to Android being more permissive with the level of control it will let apps have over the OS and the device.
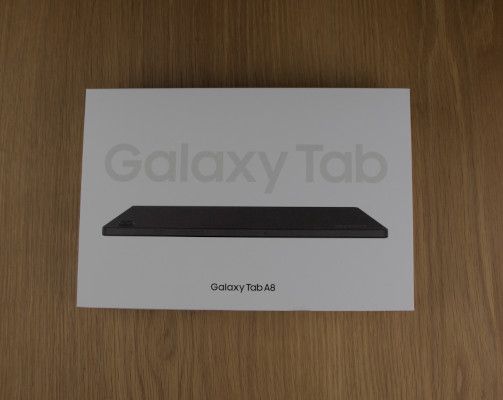
I finally settled on a Samsung Galaxy Tab A8, which has a good-sized 10.5-inch display and is reasonably priced.
Another deciding factor in choosing the Samsung was that I'd also found a good way to wall mount the tablet. The best way to wall mount a tablet so that it has a slim profile is to use a 3D-printed wall mount. Unfortunately, I don't have a 3D printer, so designing something myself or using something publicly available from somewhere like Thingiverse was out of the question Instead, I stumbled across The 3D Room which stocks a variety of 3D-printed wall mounts for tablets.
Wall Mounting The Tablet
The process of wall-mounting the tablet is relatively straightforward as the mount attaches to the screw points of a single-gang back box.
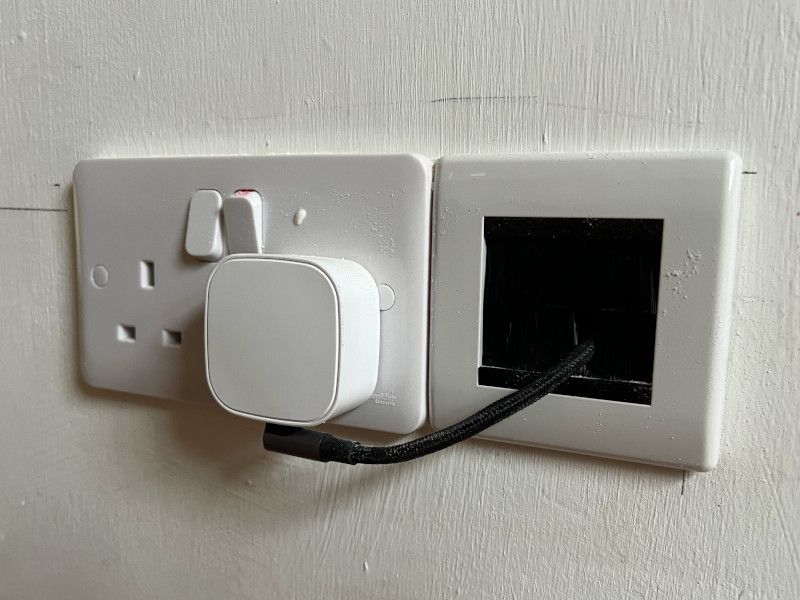
Before I could attach this to the wall, I needed power to where the dashboard would be mounted. Where I wanted to place the tablet didn't have immediate access to power, so the first job was to get another wall socket installed directly below where I wanted the tablet to be positioned. A USB-C cable running inside the wall will provide power to the tablet.
The wall mounts are designed to attach to a standard single-gang back box.
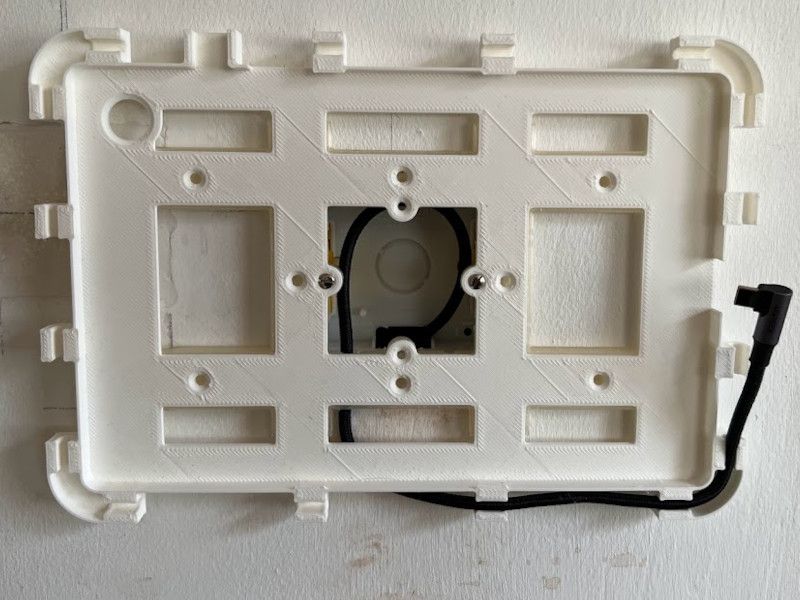
The mount comes in three parts:
- The main mounting plate (pictured and visible above)
- An optional spacer
- The front cover plate

The optional spacer, which I used, allows the mount to sit slightly off the wall and has a channel that will enable a power cable to be fed from the back box to the tablet in an entirely concealed way. The spacer will hold the mount about 0.5cm off the wall:
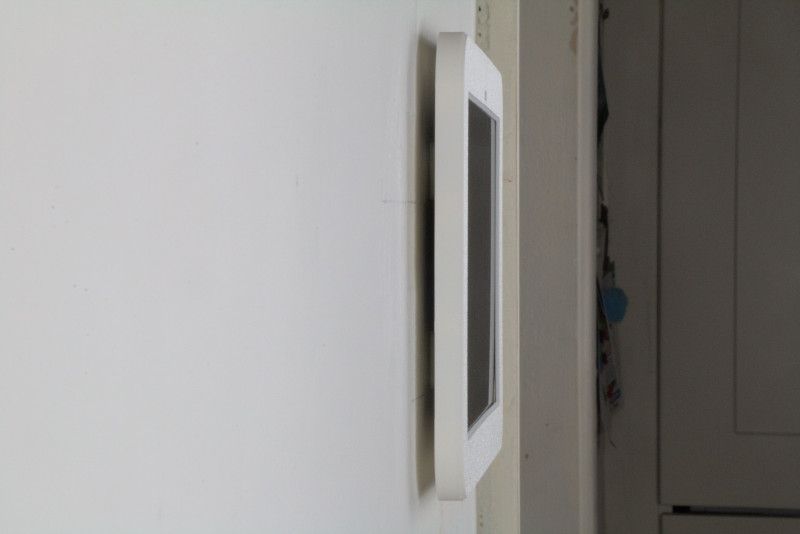
It's worth noting that I deliberately decided to run a 3 meter USB-C cable to power the tablet. Once you get to 3-meter-long USB-C cables, finding one that isn't nylon jacket braided is difficult. The nylon braided jacket makes the cable quite thick compared to a regular USB cable, so I had to use a drill to widen the groves in the wall spacer and the cable clip closest to the power jack.
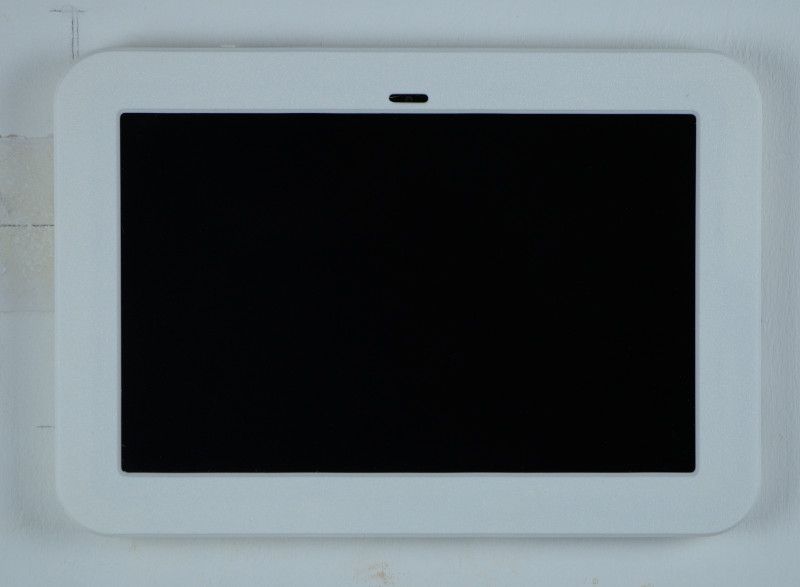
And this is the end result!
Setting Up The Dashboard
Getting the tablet wall-mounted is just the start of the process. The next steps are to ensure that the tablet functions as I want it to. This includes ensuring it runs Home Assistant in a kiosk mode and that the dashboards in Home Assistant are useful, well-designed and fit for purpose.
Kiosk Mode
I've decided to serve up the Home Assistant dashboard using Fully Kiosk Browser, a third-party Android app designed to turn a tablet into a kiosk device.
I've opted for this because the app has useful features, such as using the camera to wake the screen on motion. Some of these features do require you to buy a license which is only €7.90.
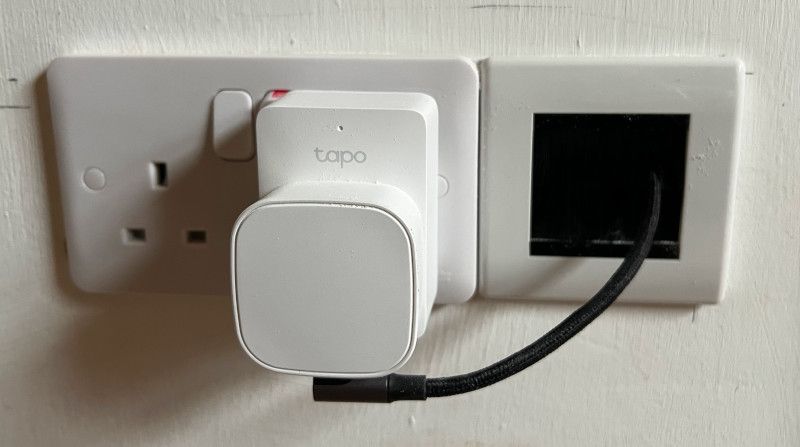
Charging and Power Management
I've decided that I'm not going to leave the tablet permenantly attached to mains power all the time. I have a spare TP-Link Tapo P110 lying around that I will automatically turn on and off using an automation based on the battery state of the tablet. There is a HACS Tapo Controller integration which can be used to control Tapo plugs directly from Home Assistant.
This means that I have the tablet logged into the Home Assistant app, which I use to collect battery state information from the tablet. However, I am using the Fully Kiosk Browser app to display Home Assistant via the browser.
With two very simple automations, I can toggle the charging of the tablet on and off depending on the battery state:
alias: "Samsung Galaxy Tab A8 - Start charging when battery low"
description: "Samsung Galaxy Tab A8 - Start charging when battery low"
mode: single
trigger:
  - type: battery_level
    platform: device
    device_id: 3e0809a7754eb87c3490dbf9a16ae460
    entity_id: sensor.samsung_galaxy_tab_a8_battery_level
    domain: sensor
    below: 10
action:
  - type: turn_on
    device_id: 8cd81bc616f2785e8482ac8f118e8e3e
    entity_id: switch.dashboard_plug
domain: switchdasboard_start_charging_battery_low.yamlalias: "Samsung Galaxy Tab A8 - Stop charging when battery full"
description: "Samsung Galaxy Tab A8 - Stop charging when battery full"
mode: single
trigger:
- type: battery_level
platform: device
device_id: 3e0809a7754eb87c3490dbf9a16ae460
entity_id: sensor.samsung_galaxy_tab_a8_battery_level
domain: sensor
above: 99
action:
- type: turn_off
device_id: 8cd81bc616f2785e8482ac8f118e8e3e
entity_id: switch.dashboard_plug
domain: switchdasboard_stop_charging_battery_full.yamlSecurity
I only want the tablet to be used for viewing and controlling dashboard screens in Home Assistant. As a result, I have created a specific user in Home Assistant that the tablet uses with non-administrative access.
My main goal with securing the tablet is to prevent someone else in the house from making accidental configuration changes via the dashboard. So even though the Fully Broser Kiosk app will allow me to put in place further restrictions, such as locking down the tablet to prevent it being used for anything else other than the kiosk app, I'm not currently using this feature.
Nicer UI
The look and feel of my main Home Assistant dashboard have remained the same since I started playing with Home Assistant two years ago.
However, now that I have a wall-mounted tablet running Home Assistant, I feel compelled to tidy up the look and feel and to make the dashboard look more presentable.
During the early research stage of this project, I discovered that many other Home Assistant users are using Mushroom cards to build out their dashboards which gives a nice set of alternative controls to the default Lovelace cards.
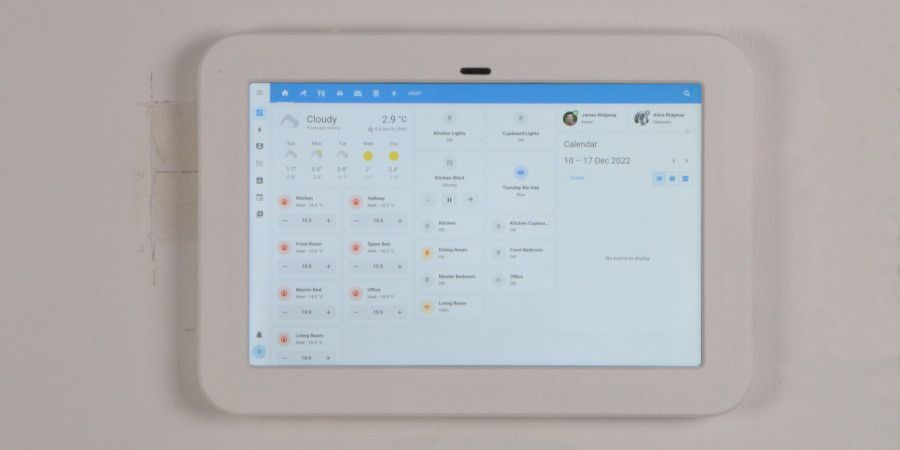
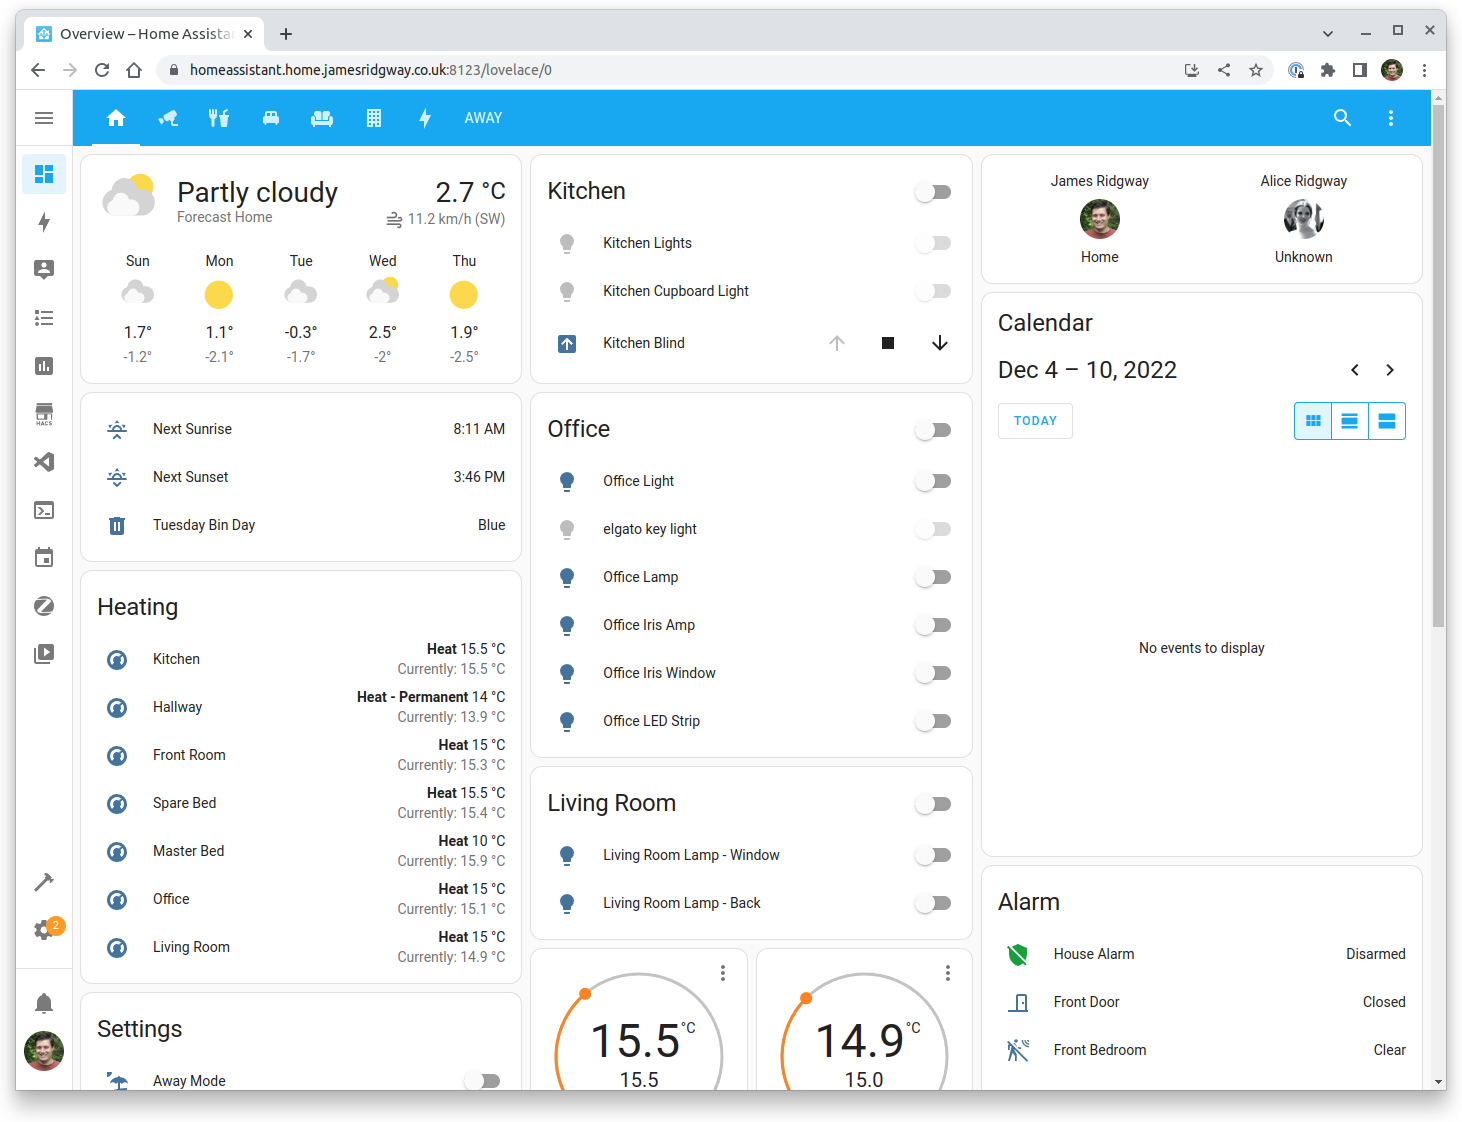
Historically my dashboard has looked like this:
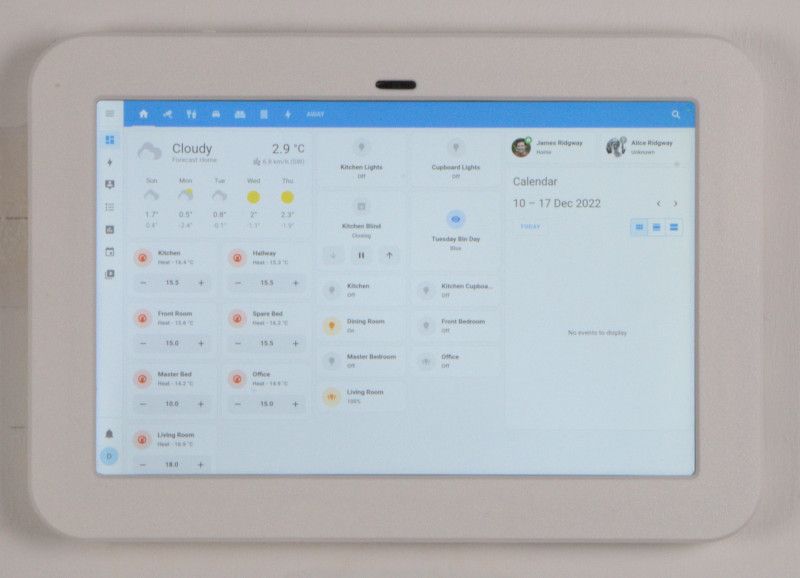
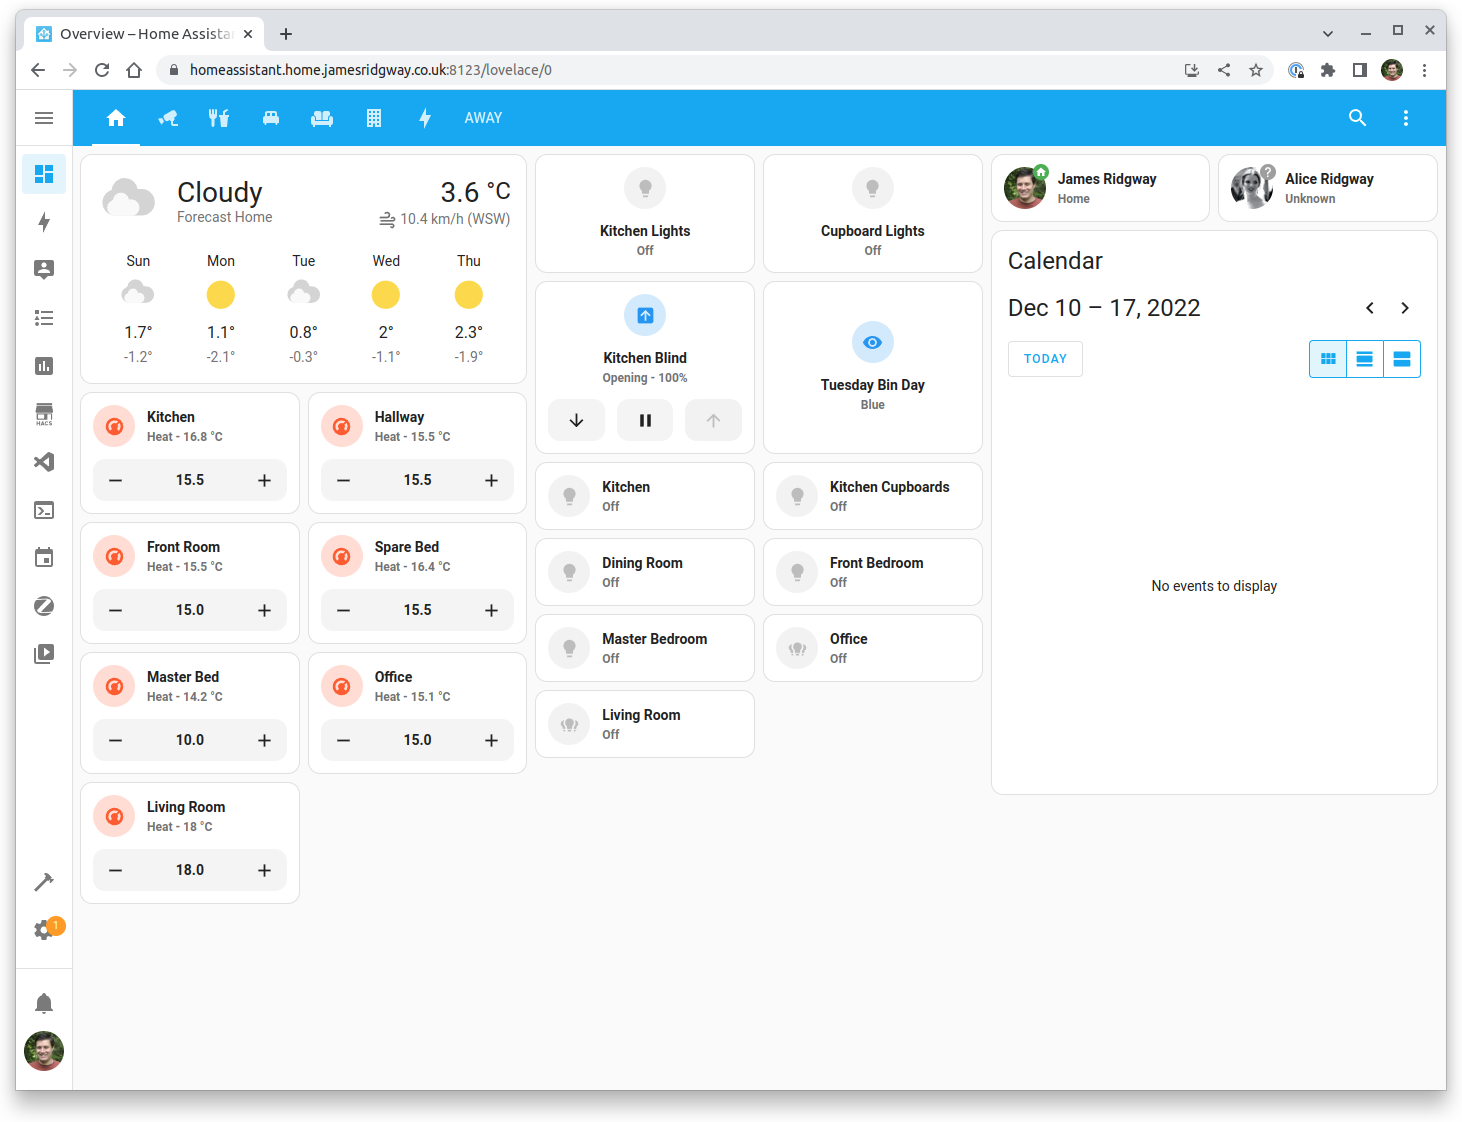
And now, using Mushroom, it looks more like this:
Since designing my original dashboard layout, I've started using different views to build screens tailored to specific rooms of the house and allow for more details control of the smart home tech in each of those rooms.
I've taken the opportunity to simplify the main view of the dashboard to provide a meaningful overview of the state of our home.
- Some controls have been moved off of the main view into a more relevant view
- The main view no longer lists out lots of lights for each room. Instead, for rooms with multiple smart lights, such as the living room and my office, I am representing the light group as a single entity control instead of listing out every single light
I like the look and feel of the Mushroom cards. Initially, I felt Mushroom lacked an "Entities" card for scenarios where I wanted to show many entities grouped together, such as lighting and heating controls. However, I overcame this by just making more use of the Horizontal and Vertical Stack cards to group things like heating and lighting controls in a more compact layout
Summary
Just over two years on, I now have my wall-mounted Home Assistant dashboard that I can use to control any of the smart home tech in the house, and I'm delighted with the end result!
Cosmetically, I've achieved exactly what I was after – a wall-mounted dashboard with nice aesthetics, unobtrusive, and positioned in part of the house where I expect it to get a lot of use.
The biggest challenge I encountered was getting power to where I needed it. However, I decided from the beginning of this project that I wanted the tablet in a useful location instead of determining the location based on where access to power was easy. Running the power to the correct location ultimately took more time, but it was definitely worth the wait and the extra effort.
All-in, this was the shopping list of tech required to make this project happen:
- Samsung Galaxy Tab A8
- Samsung Galaxy Tab A8 10.5" Wall Mount (White) by The 3D Room
- UGREEN USB C to USB C Cable Right Angle 100W (3 meters)
- 2 + 1 gang back box with 2-gang socket and an outlet face plate
- TP Link Tapo P110
I've written this blog post over several weekends, and as I write this final part of the summary, we've been using the dashboard for about a month. Although a wall-mounted Home Assistant might feel like a gimmick for some people, we've found it really useful, and it has been getting a lot of use. Even my wife uses it, which must mean it's one of my better home automation ideas!
