

Last year I made my own Raspberry PI powered LED strip for the desk in my home office, and since then, I've been using an integration I developed using AppDaemon to control the strip via Home Assistant.
Whilst this approach does work, it does have several limitations. My AppDaemon based solution depends on Home Assistant emitting events that the app can then consume and process. Because the LED strip isn't an actual light entity in Home Assistant, I can't use any of Home Assistant's native dashboard light controls to interact with the LED strip.
In this blog post, I will explain how a Template Light can be used to control a custom light, such as the Raspberry PI powered LED strip that I built for my home office.
Light Entities
I've recently added some Philips Hue lights to my office. With these lights, I can toggle them on and off and change the colour directly through Home Assistant without any special setup because Home Assistant recognises these lights as being Light Entities:
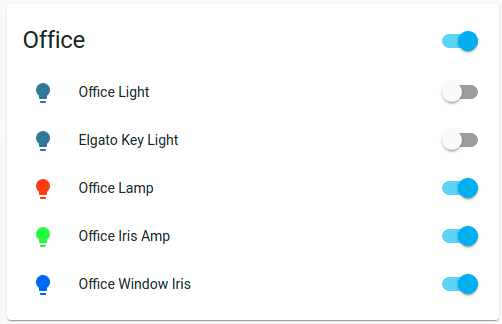
It is becoming increasingly frustrating that I can't control my LED light strip the same way I can with my other lights by simply tapping on the bulb icon and then adjusting the colour or brightness accordingly.
I want to add the LED strip to this above set of lights on my dashboard, but at the moment, Home Assistant doesn't see the LED strip as a light entity, and I'm limited to just turning on and off the LED strip based on a motion sensor automation script.
Today, my challenge is to replace the AppDaemon python script integration (which has served me well) with an alternative implementation that will allow Home Assistant to treat the LED light strip as an actual light entity.
Building an API for the LED Strip
Firstly, I need to write an HTTP API that can turn the lights on and off and adjust the colour and the brightness. The code that I originally wrote for controlling the LED strip used a Redis queue to receive its instructions. From this original codebase, I plan to keep the code that controls the WS2812b LED strip and replace the Redis handling code with a lightweight HTTP API for receiving instructions from Home Assistant.
Why go HTTP?
Home Assistant supports a RESTful Switch; therefore, I plan to use a RESTful switch and a series of inputs which will be glued together in Home Assistant with a Template Light to provide me with a light entity for my LED Strip.
The API
The API provides a single POST /led-strip endpoint that takes a basic payload:
{
  "on": true,         # Required, boolean
  "hue": 360,         # Optional, 0-360
  "sat": 100,         # Optional, 0-100
  "brightness": 255   # Optional, 0-255
}
You can find all of the source code, including the lightweight Flask API, here:
 jamesridgway
This code runs on the Raspberry PI that is connected to the LED Strip.
Using a Template Light to Create a Light Entity
A Template Light will allow us to call different services in Home Assistant to either: turn on, turn off, adjust brightness or adjust the colour of the light. For the most part, our Template Light will be making various calls to a RESTful Switch which seems to be one of the more straightforward ways to integrate Home Assistant with a third-party tool or system (provided it can support HTTP).
Tracking Brightness and Colour
To track the brightness and colour values in Home Assistant, I have added three number input helpers:
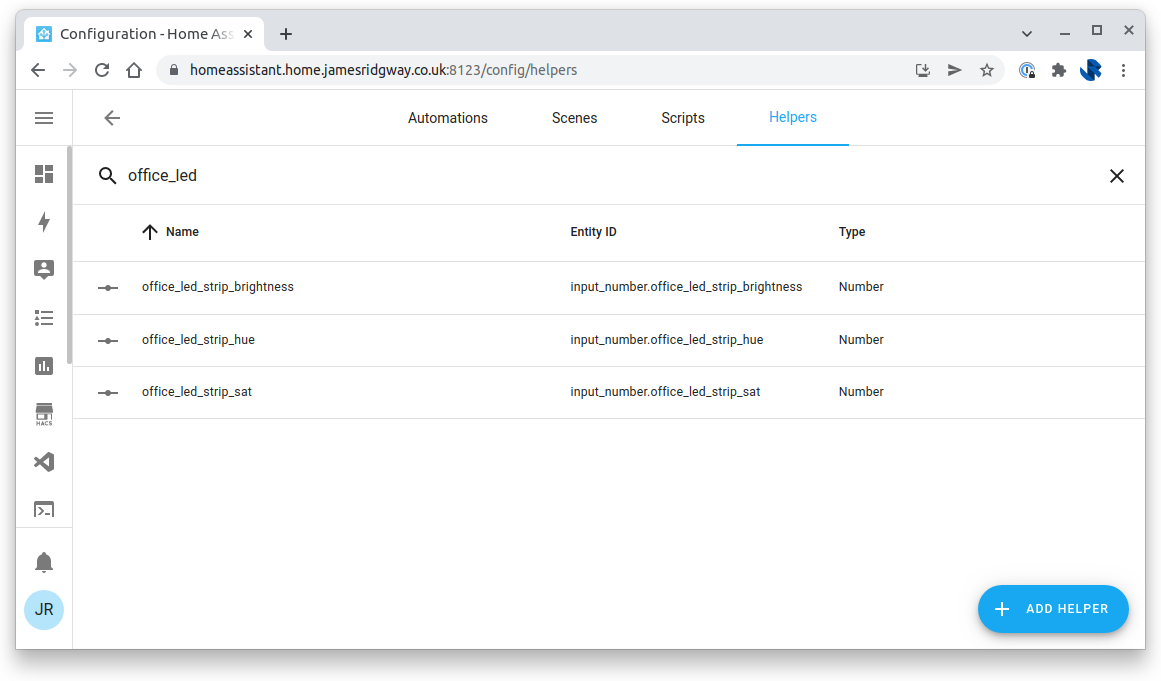
office_led_strip_brightnesshas a range of0to255office_led_strip_huehas a range of0to360office_led_strip_sathas a range of 0 to 100
All three of these inputs use a Display mode of Slider and a Step size of 1.
Creating the RESTful Switch
I like to try and keep my Home Assistant configuration separated and organised, so in my configuration.yaml I have added the line:
switch: !include switch.yamlconfiguration.yamlAnd I have created a switch.yaml, which contains the definition for the RESTful switch that will invoke the Flask API I have written for the LED strip:
- platform: rest
  name: office_led_strip
  resource: http://192.168.1.27:5000/led-strip
  body_on: '{"on": true, "hue": {{ states("input_number.office_led_strip_hue") }}, "sat": {{ states("input_number.office_led_strip_sat") }}, "brightness": {{ states("input_number.office_led_strip_brightness") }}}'
  body_off: '{"on": false}'
  is_on_template: "{{ value_json.on }}"
  headers:
    Content-Type: application/json
switch.yamlWhenever the switch is turned off, Home Assistant will post the body_off payload, and whenever the switch is turned on, the body_on payload will be posted, including the hue, saturation, and brightness values tracked by our helper inputs.
Creating the Template Light
Creating the Template Light will require adding a light section to your configuration.yaml. I've done this in the same way that I added the switch:
light: !include light.yamlconfiguration.yamlOur light.yaml with then look as follows:
- platform: template
  lights:
    office_led_strip:
      friendly_name: "Office LED Strip"
      value_template: "{{ states('switch.office_led_strip') == 'on' }}"
      color_template: "({{ states('input_number.office_led_strip_hue') | int}}, {{ states('input_number.office_led_strip_sat') | int}})"
      turn_off:
        service: switch.turn_off
        target:
          entity_id: switch.office_led_strip
      turn_on:
        service: switch.turn_on
        target:
          entity_id: switch.office_led_strip
      set_level:
        - service: input_number.set_value
          data:
            value: "{{ brightness }}"
            entity_id: input_number.office_led_strip_brightness
        - service: switch.turn_on
          data_template:
            entity_id:
              - switch.office_led_strip
      set_color:
        - service: input_number.set_value
          data:
            value: "{{ h }}"
            entity_id: input_number.office_led_strip_hue
        - service: input_number.set_value
          data:
            value: "{{ s }}"
            entity_id: input_number.office_led_strip_sat
        - service: switch.turn_on
          data_template:
            entity_id:
              - switch.office_led_strip
The template light takes a few simple values (friendly name, value template, colour template) before requiring definitions for the various operations (turn_off, turn_on, set_level, set_color).
I've given my light the friendly_name of Office LED Strip. value_template is used to determine if the light is on or not; this performs a simple state check against the switch.
colour_template takes the hue and saturation as a tuple where each value has been cast to an integer.
The rest of the template defines various service calls for each operation. turn_on and turn_off are reasonably straightforward - these operations turn on or turn off the RESTful switch.
set_level and set_color are used to set the brightness and colour, respectively. These two implementations are a little more involved but are still reasonably straightforward.
set_level uses two service calls. The first call is to input_number.set_value to store the brightness level in the variable. The second call is to turn on the RESTful switch. If you remember the body_on payload from our RESTful switch, the current hue, saturation and brightness values for light will be posted to the API whenever the switch is told to turn on.
set_color works the same. The only difference is that hue and saturation are provided by two separate variables, both of which need saving before the switch can be turned on again.
All we need to do is reload our Home Assistant configuration, and we're ready to go!
Conclusion
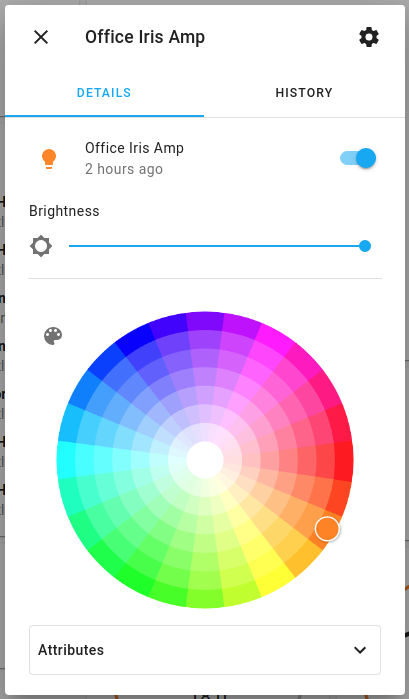
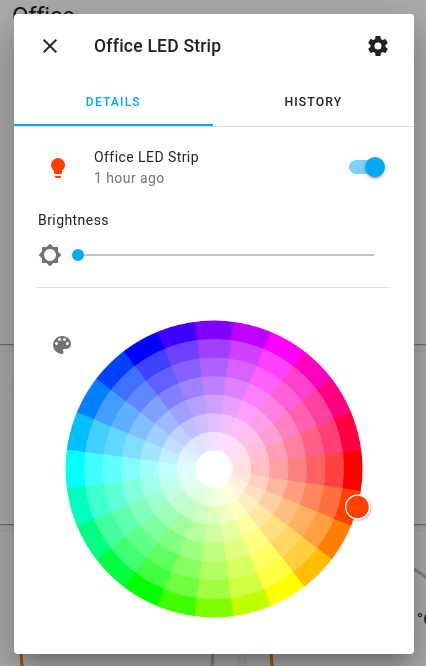
Now that my LED Strip is an actual light entity I can take advantage of using the LED strip the same way that I can any other light in Home Assistant. I have since updated my dashboard to include the LED Strip:
I can click on the LED Strip to turn it on and off and adjust the colour and brightness!
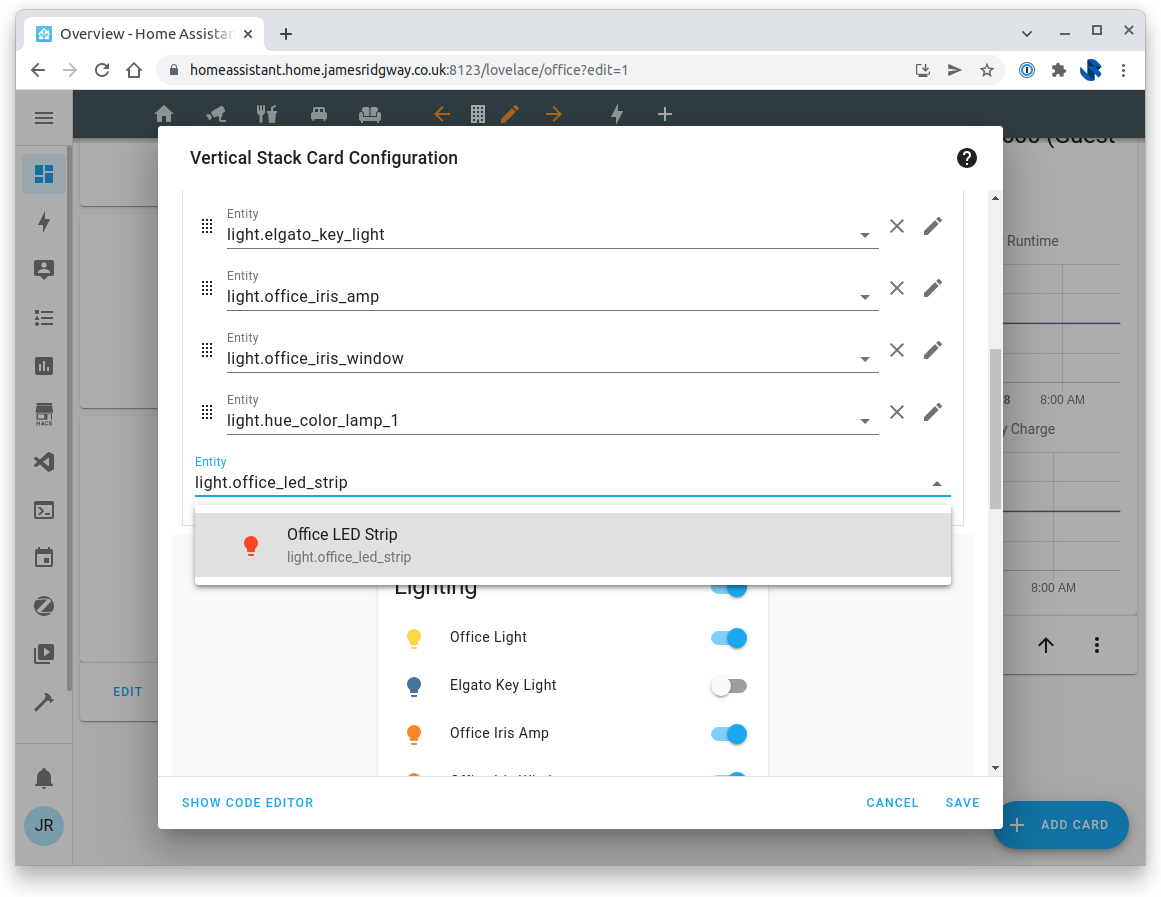
This improvement has also led me to start experimenting with light groups too. With a lighting group, you can control a group of lights together as if they are one light.
A lighting group can be added to your light.yaml file as follows:
- platform: group
  name: Office Lights
  entities:
    - light.shellydimmer2_fedcba0123456 # Office Light
    - light.office_iris_amp # Office Iris Amp
    - light.office_iris_window # Office Iris WIndow
    - light.hue_color_lamp_1 # Office Lamp
    - light.office_led_strip # Office LED Strip
This allows you to place lighting group controls on your dashboard or use lighting groups within automations, making keeping automations up-to-date much more effortless.
Another benefit of this setup is that I no longer need the custom integration to control the LED strip that I build for my stream deck. Instead, I can just rely on the Home Assistant plugin, which already supports lights and switches, vastly simplifying my setup.
