
I recently blogged about how I moved my website from being a custom Ruby on Rails blog hosted in AWS to Ghost(Pro) fronted by Cloudflare.
Switching over to Ghost(Pro) was a fairly slick process until I got an email from Keybase informing me that I’d broken my websites Proof:
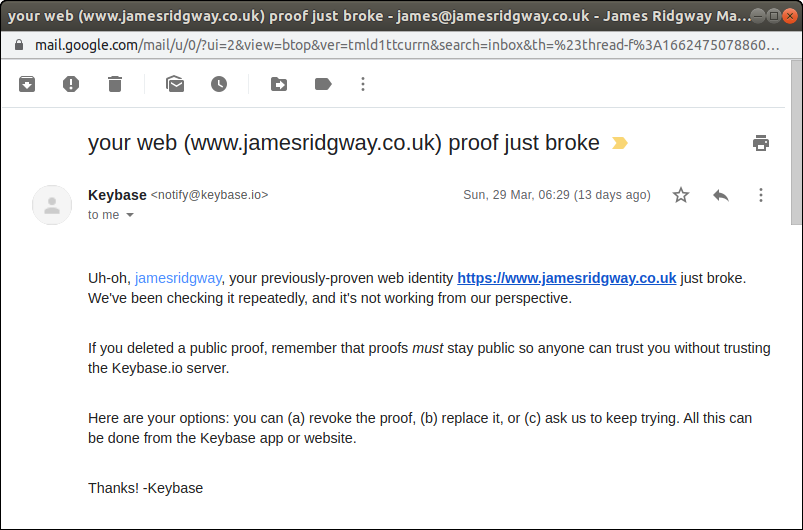
Keybase is a key directory that offers end-to-end chat encryption as well as identity proofs that allow you to prove a link between your online identities (Websites, Twitter, GitHub, etc) and your encryption key.
I had setup my website to host a Keybase proof (text file) that proved as a cryptographic link between my website and my encryption key.
Cloudflare Workers to the Rescue!
When I planned to migrate to Ghost(Pro) and Cloudflare, I’d completely forgotten about Keybase and the proof that the site was hosting.
The challenge I faced is that Ghost is a blogging platform, and doesn’t have provisions for hosting text files or doing anything outside of being a great blogging platform.
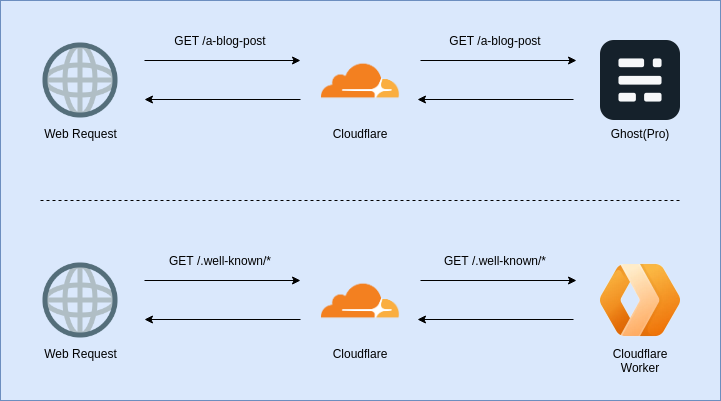
This is where Cloudflare Workers come in. A Cloudflare worker lets you run JavaScript on Cloudflare’s edge-nodes in response to a HTTP(S) request to your website. A worker can be used to modify the request and/or response.
I can use a Cloudflare Worker to intercept the request made by Keybase for the proof file and respond with the proof instead of sending the request on to Ghost. The Keybase proof is a text file that sits in the .well-known directory

Let's take a look at how we can write some code for a Cloudflare Worker and version control it in git.
Wrangler
Wrangler is a CLI tool for developing, testing and publishing code for a Cloudflare Worker. Cloudflare Worker's are entirely JavaScript so as you'd probably expect, Wrangler is also implemented in JavaScript and can be installed via npm:
npm i @cloudflare/wrangler -gWe need to configure Wrangler with an API token from the Cloudflare Dashboard:

Cloudflare provides a number of templates for creating an API token with refined permissions:
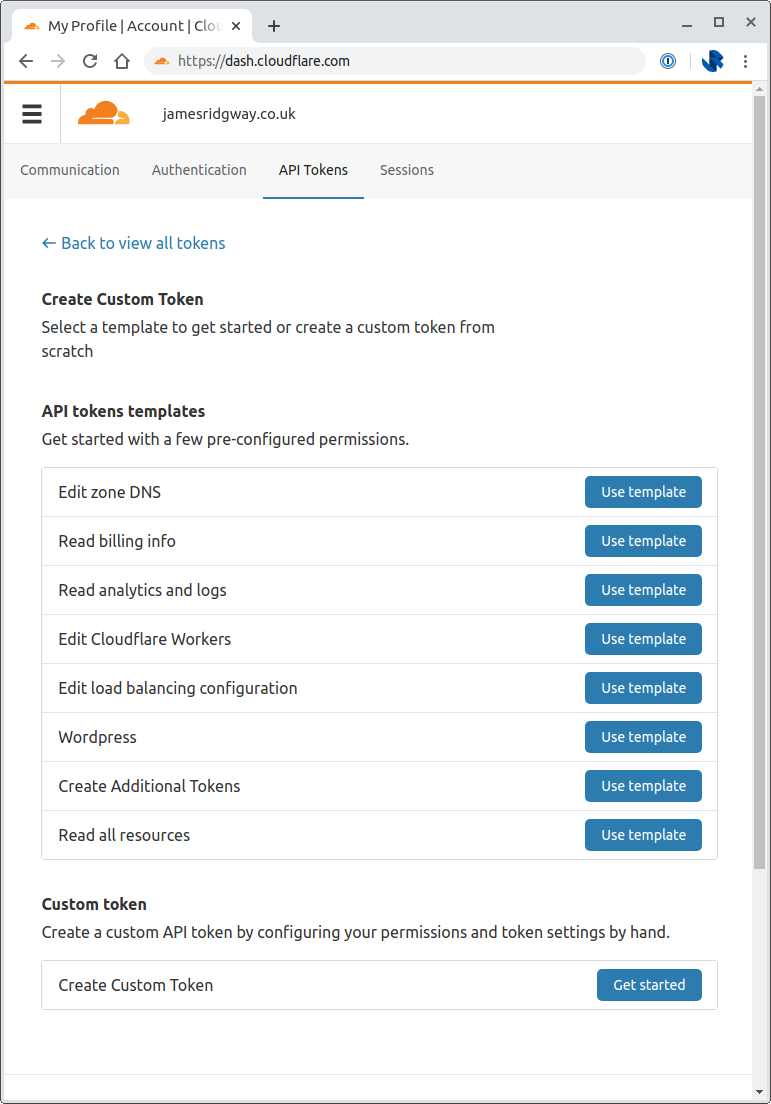
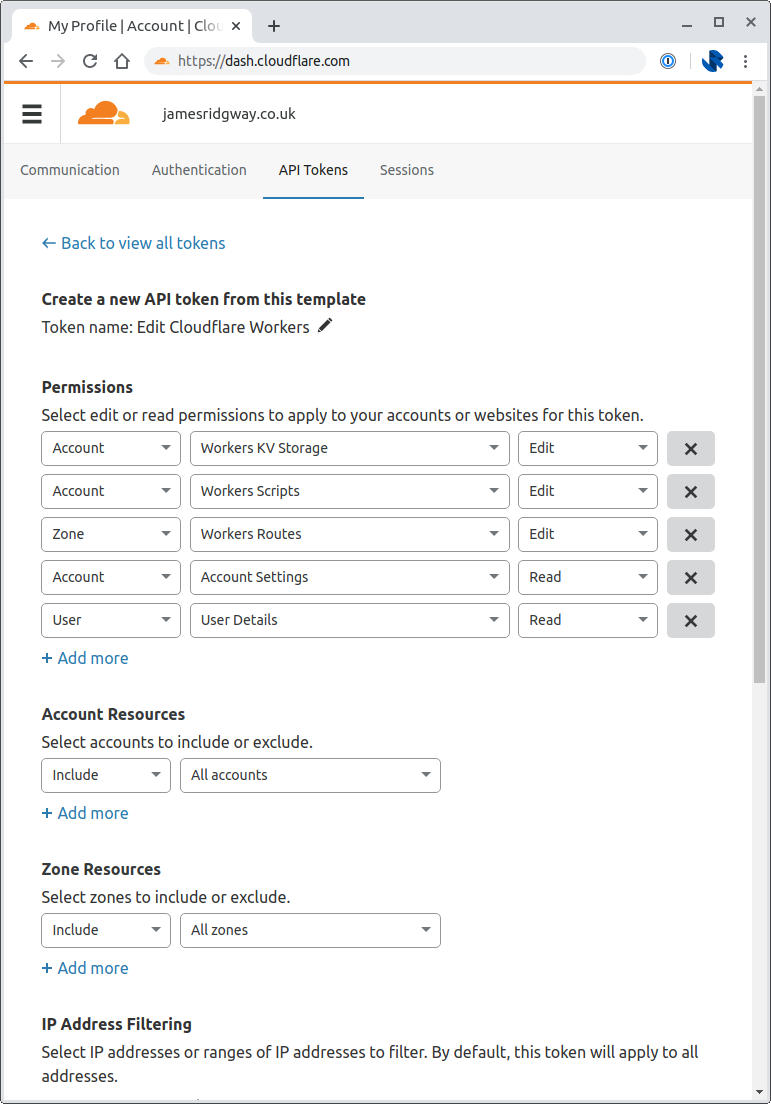
Pick Edit Cloudflare Workers. As this is my personal account I was comfortable creating an API token that has access to all Account Resources and all Zone Resources, so I set these both to include all accounts and include all zones under the respective Account Resources and Zone Resources sections.
From your terminal window run wrangler config and provide your API token that you've just created.
Now we can create our new project:
$ wrangler generate cloudflare-worker-security
 Installing cargo-generate...
 Creating project called `cloudflare-worker-security`...
 Done! New project created /home/james/projects/cloudflare-worker-security
 You will need to update the following fields in the created wrangler.toml file before continuing:
 You can find your account_id and zone_id in the right sidebar of the zone overview tab at https://dash.cloudflare.com
- account_id
The Worker
A Keybase proof is a textfile that's generated from Keybase and that you host as a specific URL such as /.well-known/keybase.txt. Whilst doing this I also wanted to setup a security.txt that provides anyone wanted to report a security vulnerability with clear instructions of how to contact the person responsible for security of the website.
In short, our worker just needs to serve up some text files in response to specific requests.
The Keybase proof is fairly big, and I don't want to try and embed the contents of the textfiles within the code, I'd rather reference the text files.
raw-loader is a webpack module that allows strings to be loaded from text files.
Wrangler knows how to handle our code based on the wrangler.toml file in our project. We will need to alter this to setup our project to use webpack, and to ensure that the worker serves traffic from the correct route:
name = "cloudflare-worker-security"
type = "webpack"
webpack_config = "webpack.config.js"
account_id = ""
workers_dev = false
route = "www.jamesridgway.co.uk/.well-known/*"
zone_id = ""We now need to create the webpack.config.js file so that webpack will load the txt files using raw-loader:
const path = require('path')

module.exports = {
  entry: './index.js',
  output: {
    path: path.resolve(__dirname, 'dist'),
    filename: 'worker.js',
  },
  module: {
    rules: [
      {
        test: /\.txt$/i,
        use: 'raw-loader',
      },
    ],
  },
}Now that we're able to load in text files we can implement the logic for our worker:
// Load the text files from a txt folder
import keybaseTxt from './txt/keybase.txt';
import securityTxt from './txt/security.txt';

async function handleRequest(request) {
  const { url } = request

  // Respond with the keybase proof if it is requested
  if (url.includes('/.well-known/keybase.txt')) {
    return new Response(keybaseTxt, {
      headers: { 'content-type': 'text/plain; charset=utf-8' },
    })
  }

  // Respond with the security.txt if it is requested
  if (url.includes('/.well-known/security.txt')) {
    return new Response(securityTxt, {
      headers: { 'content-type': 'text/plain; charset=utf-8' },
    })
  }

  // Return a 404 for any other request
  return new Response('', {
    status: 404,
  })

}

addEventListener('fetch', event => {
  event.respondWith(handleRequest(event.request))
})We could now publish this with wrangler publish if we wanted to publish this from our own machine.
It's worth noting that in the wrangler.toml file we did not configure an account_id or a zone_id. I did this deliberately as I wanted to share my code online in a fairly easy to re-use fashion.
You can go back and populate those values in the toml file, or you can pass the values in using environment variables:
$ CF_ACCOUNT_ID=xyz CF_ZONE_ID=abc wrangler publishBeing able to set these values via environment variables will be important when we attempt to automate the deployment of our worker.
Deploying with GitHub Actions
Last summer GitHub announced that they'd be launching a new set of functionality called GitHub Actions. It's aimed at automating workflows, from typical CI/CD tasks, through to automation around issues and pull requests.
Needless to say, I'd been looking forwards to playing with it:
Looking forward to playing with @github actions! #GitHubActions pic.twitter.com/ba525qkwae
— James Ridgway (@james_ridgway) August 27, 2019
When I wrote about moving my website from a custom Rails app to Ghost, the intention was to spend less time maintaining my website and more time working on projects and writing them up. With that in mind I wanted to make sure that updating the security.txt or Keybase proof is just a change to the text file and a git push – this is where GitHub Actions comes in.
GitHub Action workflows are defined as yaml files in .github/workflows of a given repository.
One of the great things about the GitHub Actions ecosystem is that anyone can write and publish an action that can be re-used by anyone. The folks over at Cloudflare have written a wrangler-action that we can leverage!
name: Deploy

on:
  push:
    branches:
      - master

jobs:
  deploy:
    runs-on: ubuntu-latest
    name: Deploy
    steps:
      - uses: actions/checkout@master
      - name: Publish
        uses: cloudflare/wrangler-action@1.1.0
        with:
          apiToken: ${{ secrets.CF_API_TOKEN }}
        env:
          CF_ACCOUNT_ID: ${{ secrets.CF_ACCOUNT_ID }}
CF_ZONE_ID: ${{ secrets.CF_ZONE_ID }}This workflow is designed to run a master branch push. When a change is pushed to master, Actions will run a series of steps on an Ubuntu image under a job called "Deploy":
- Checkout the git repository
- Run the
wrangler-actionproviding theapiTokenas an argument and settingCF_ACCOUNT_IDandCF_ZONE_IDenvironment variables.
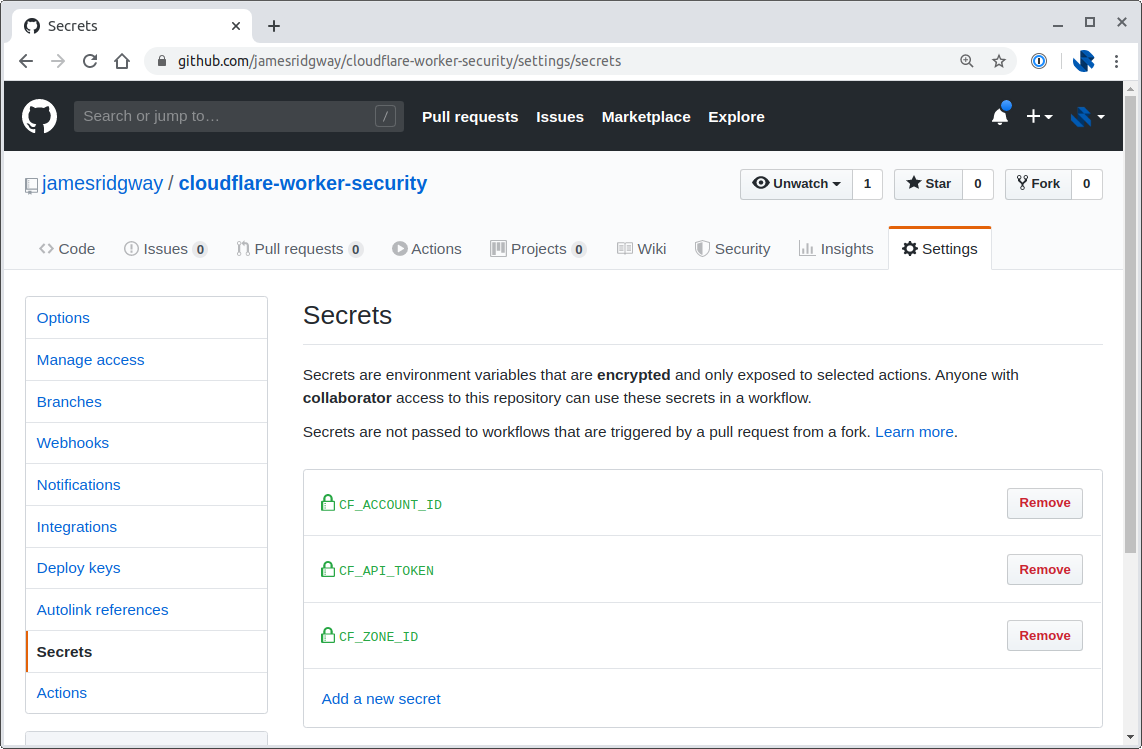
The values for the API Token, Account ID and Zone ID are read from the Secrets in your GitHub repository settings. This allows you to have public repositories that can use Actions without exposing secrets to the general public:
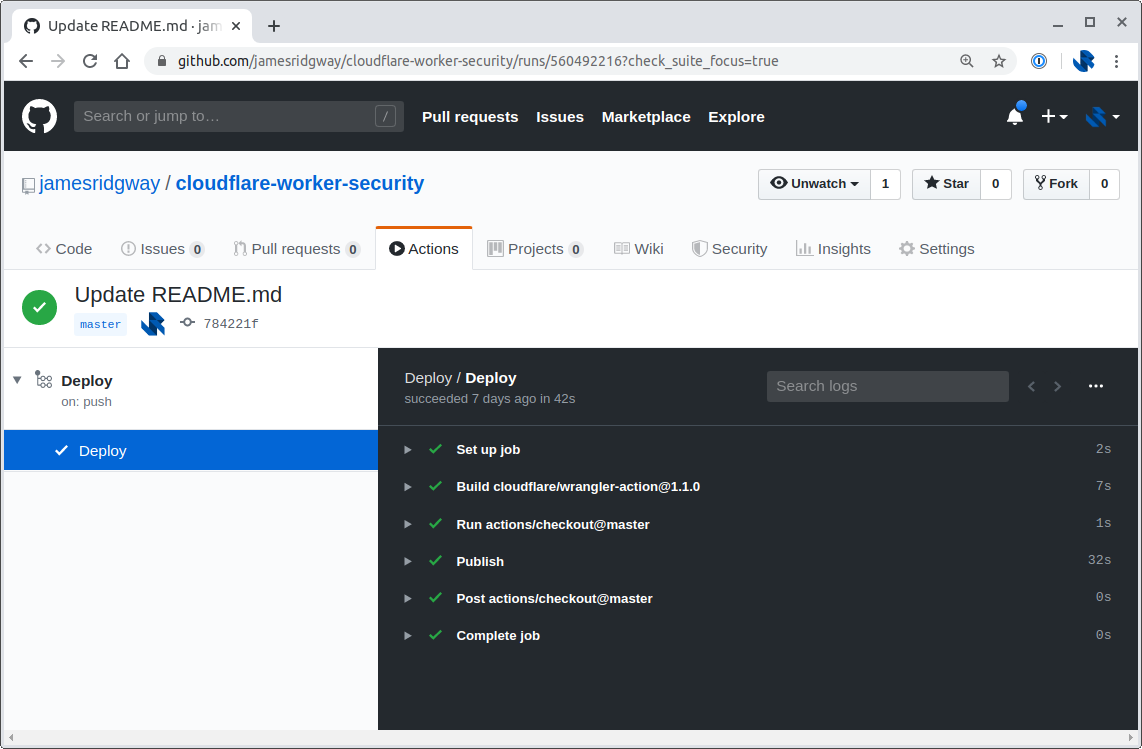
It Works!
I can now push my code to GitHub and let GitHub Actions take care of publishing the code to my Cloudflare account:
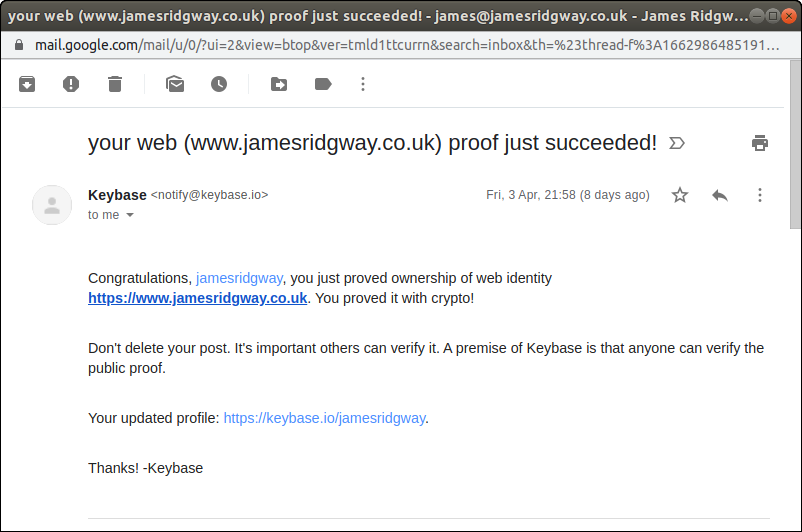
A few minutes after doing this I got an email from Keybase confirming that the proof was now working again:
I've also made the code for this publicly available in my cloudflare-worker-security repo on GitHub.
