
Losing data sucks. If you've ever accidentally deleted something or had a hard disk fail, you'll know what I mean. This week, one of the disks in my HP Microserver failed. Fortunately, I haven't lost any data because I run the disk cluster in a ZFS Pool.
Back in 2015, I decided to fit out my microserver with a decent amount of storage – four 4TB HDDs and a separate 256GB SSD for the operating system.
16.25TB should keep me going for a while.... pic.twitter.com/Pved7wFiDX
— James Ridgway (@james_ridgway) May 23, 2015
The goal of all of this storage was to have a primary ZFS datastore that I could use for managing all of my data in a sensible, redundant and fault-tolerant way.
My server has been running 24/7 with this setup for nearly nine years before experiencing a single disk failure, which is not bad!
The Failure
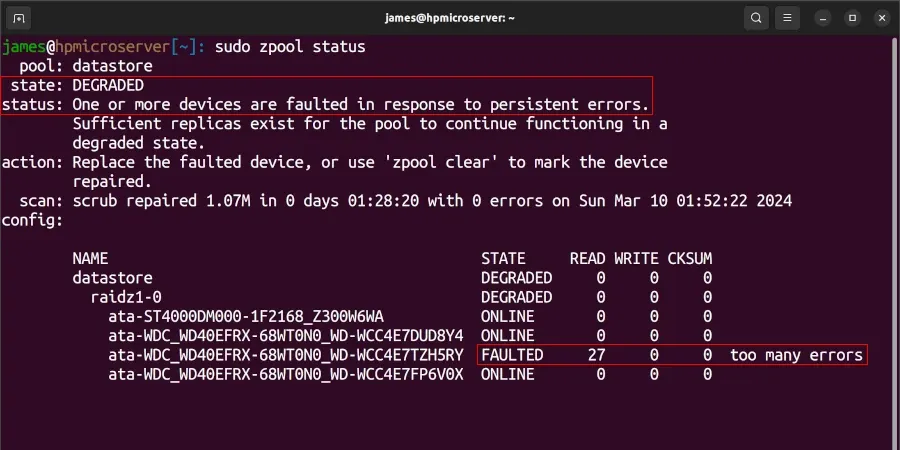
I no longer use monitoring tools such as Zabbix or Icinga on my microserver because it feels like overkill for a personal microserver. Instead, I periodically check the status of the cluster, and by chance, earlier this week, I ran sudo zpool status on the server, and this was the first time in nine years of running a ZFS pool that I'd observed an issue:
The status was the first thing that jumped out to me:
state: DEGRADED
status: One or more devices are faulted in response to persistent errors.
What kept me calm was the following sentence:
Sufficient replicas exist for the pool to continue functioning in a degraded state.Phew, no data has been lost. Time to jump on to Amazon and order a new 4TB WD Red.
Replacing the disk
The process of replacing a disk in ZFS is fairly straightforward.
First, start by marking the disk in question as offline:
sudo zpool offline datastore ata-WDC_WD40EFRX-68WT0N0_WD-WCC4E7TZH5RYNext, shutdown the server, remove the failed hard disk and insert the new disk noting the serial number of the disk which should be on the label – in this case it ends 9AR.
When the server has booted again, we need to find the correct ID to use for the zpool replace command. We can find this by looking through /dev/disk/by-id based on the serial number:
ls -alh /dev/disk/by-id/ | grep 9AR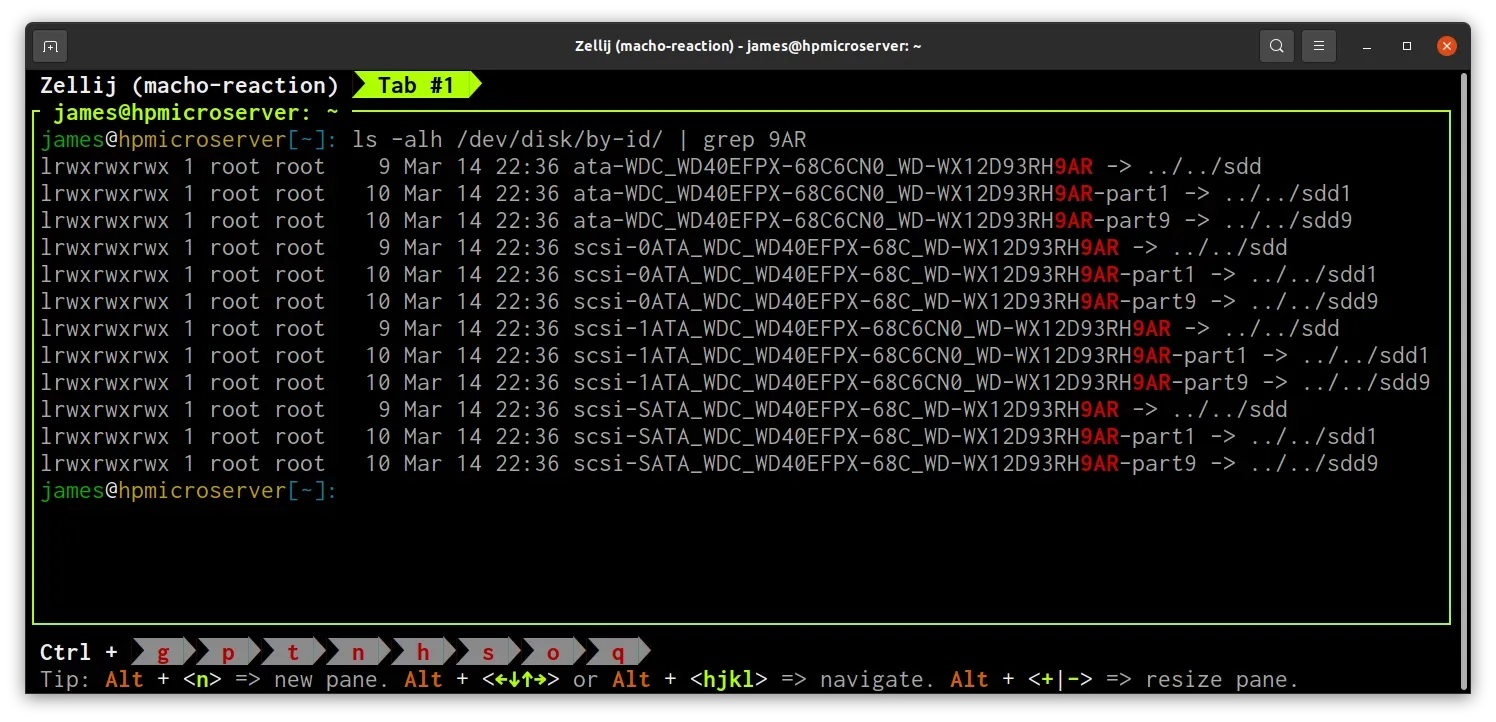
The ID for my new disk is ata-WDC_WD40EFPX-68C6CN0_WD-WX12D93RH9AR. We can now run the replace command by providing the ID of the failed hard disk and the ID of the new replacement:
sudo zpool replace datastore ata-WDC_WD40EFRX-68WT0N0_WD-WCC4E7TZH5RY ata-WDC_WD40EFPX-68C6CN0_WD-WX12D93RH9ARZFS will now start the processing of rebuilding the contents of the disk from the remaining healthy disks in the cluster. This process is known as "resilvering".

The status of resilvering can be monitored by running zpool status.
At this point there is nothing more I can do, I just need to wait for the resilvering operation to complete.
Conclusion
A few hours later, the resilvering operation was completed successfully.
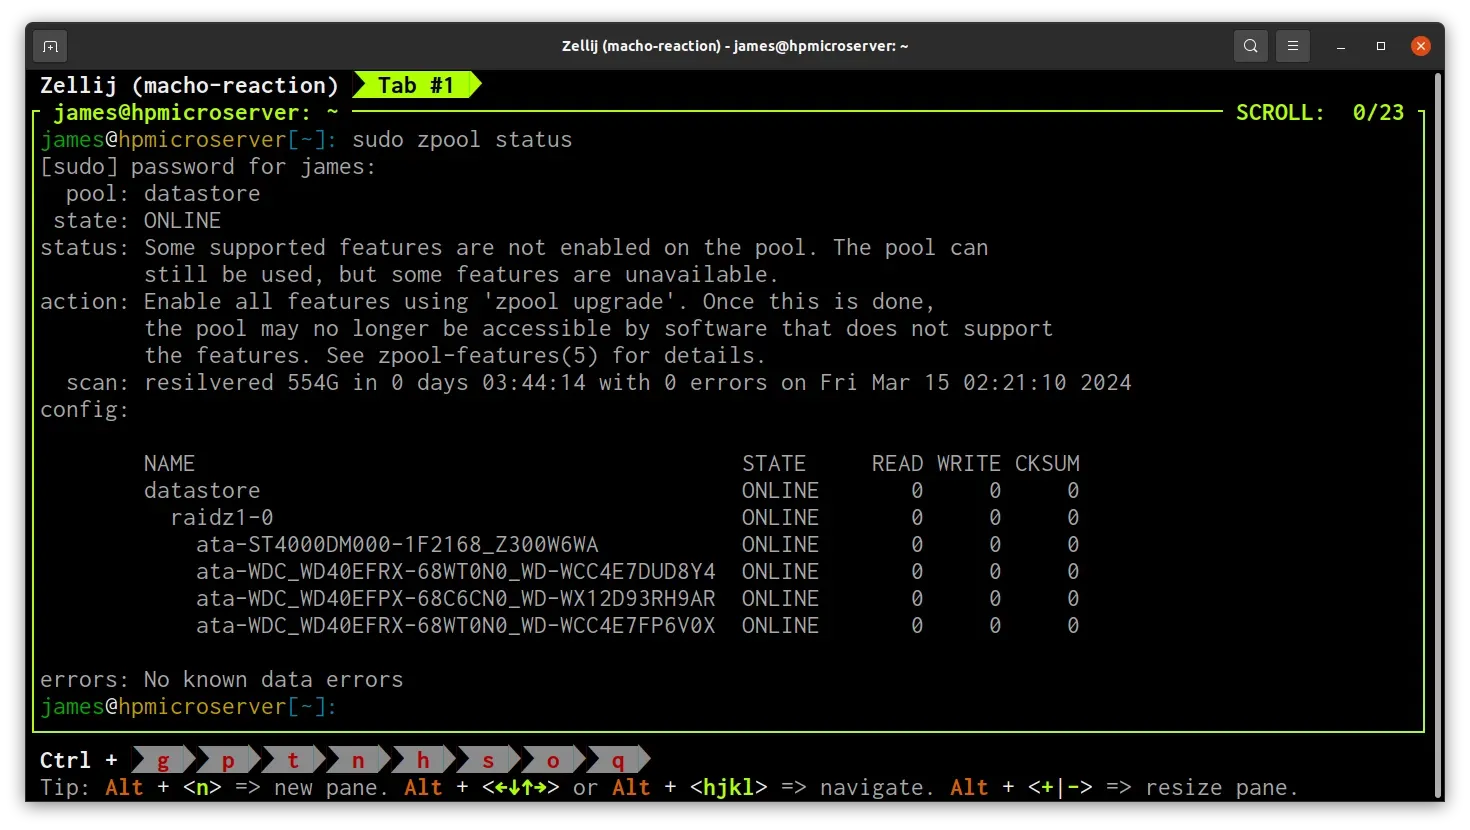
It took ZFS 3 hours and 44 minutes to complete the resilvering process, and I now have a fully healthy disk pool will all 4 disks reporting as online!
This is the first time I've had to replace a disk in ZFS after nine years without an issue, but fortunately, the process is straightforward. Hopefully, I can wait survive another ~nine years before the next failure!
