

When we moved house last year I decided that I wanted to network it properly and have a good quality, reliable network. Over the last year and a bit, I'd seen a lot of talk of Ubiquiti on the internet and decided to give it a go myself. And by giving it a go, I bit the bullet and went "all in".
The Previous Network
For a couple of years I'd been getting by with a fairly basic setup. For the most part I was running off of a TP-Link Archer VR600, a few powerline adaptors and a couple of dump switches (one for my office setup and another for all the living room devices).
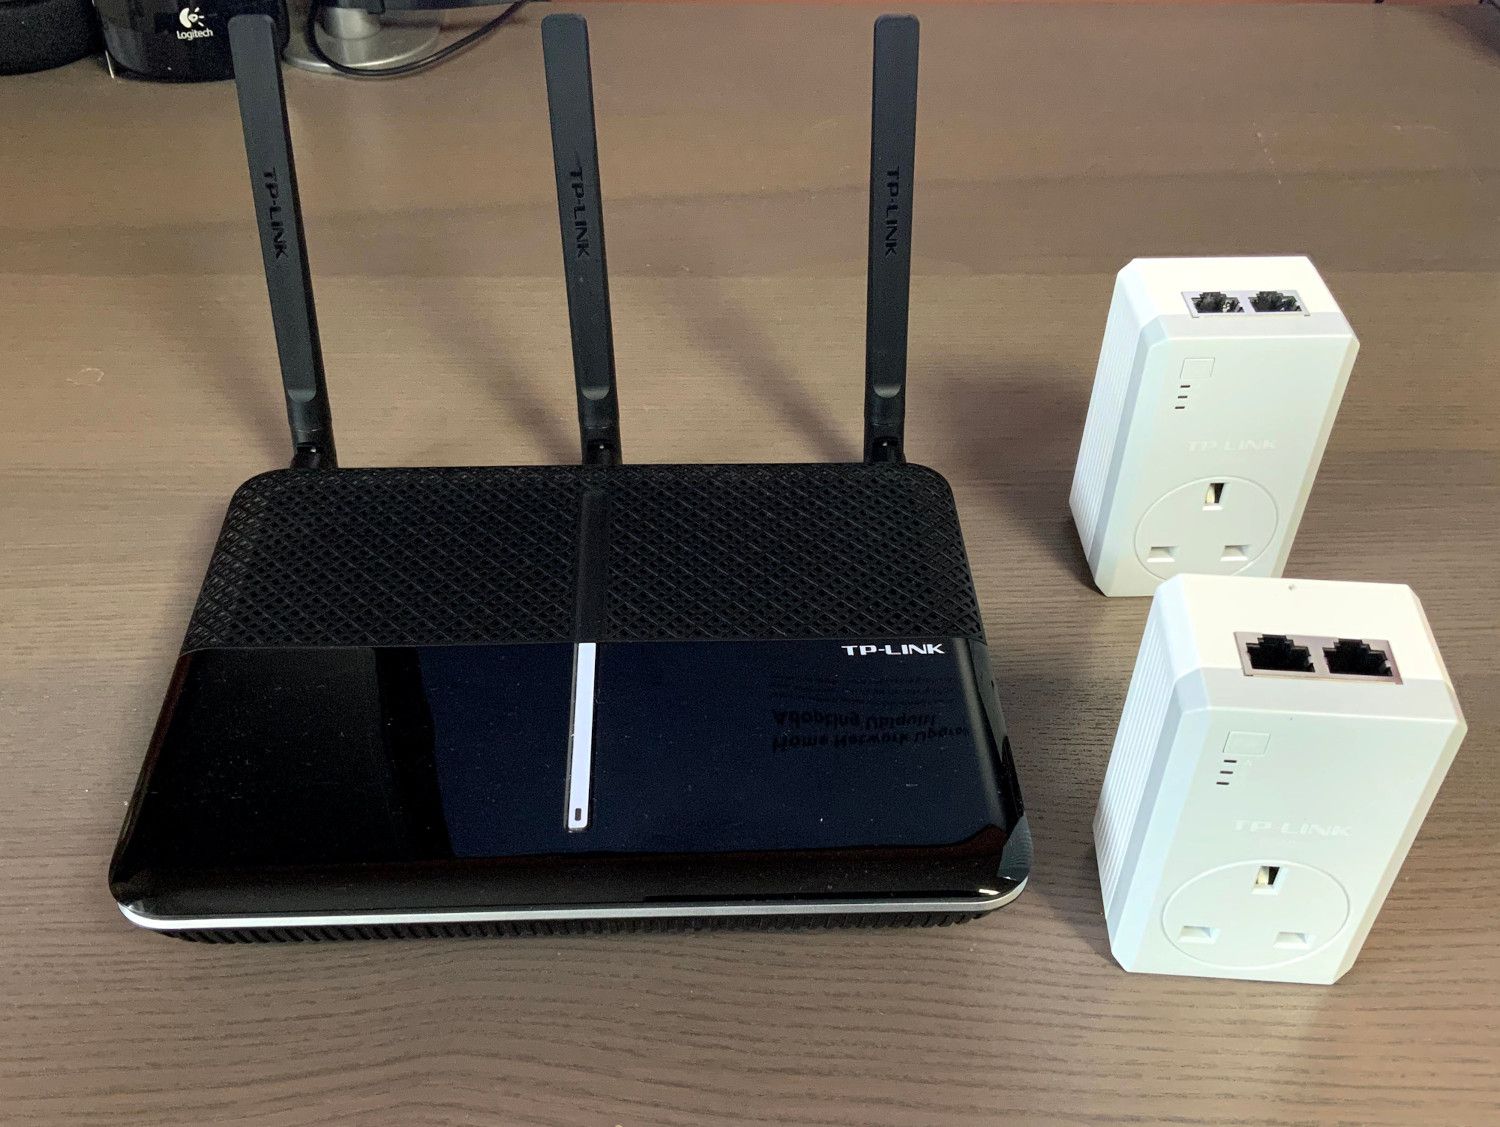
Before we moved house the VR600 had developed an issue where it would just go AWOL roughly every two months and the only way to bring it back to life was to perform a hard reset and restore a backup of the configuration.
New Network Objectives
I'd been holding out doing anything different networking wise until we moved house because I had a pretty clear idea of what I wanted to do with the new house:
- Wired network access from each room in the house.
(Proper wired connections, no powerline stuff, this will require running network cable round the outside of the house) - WiFi that will work throughout the house and extend to the garden.
- Easy to manage and configure including choosing how DNS and DHCP works.
- Ability to have an isolated guest network
- Put up CCTV so that I can keep an eye on things (this requirement came later when I realised Ubiquiti also did CCTV products)
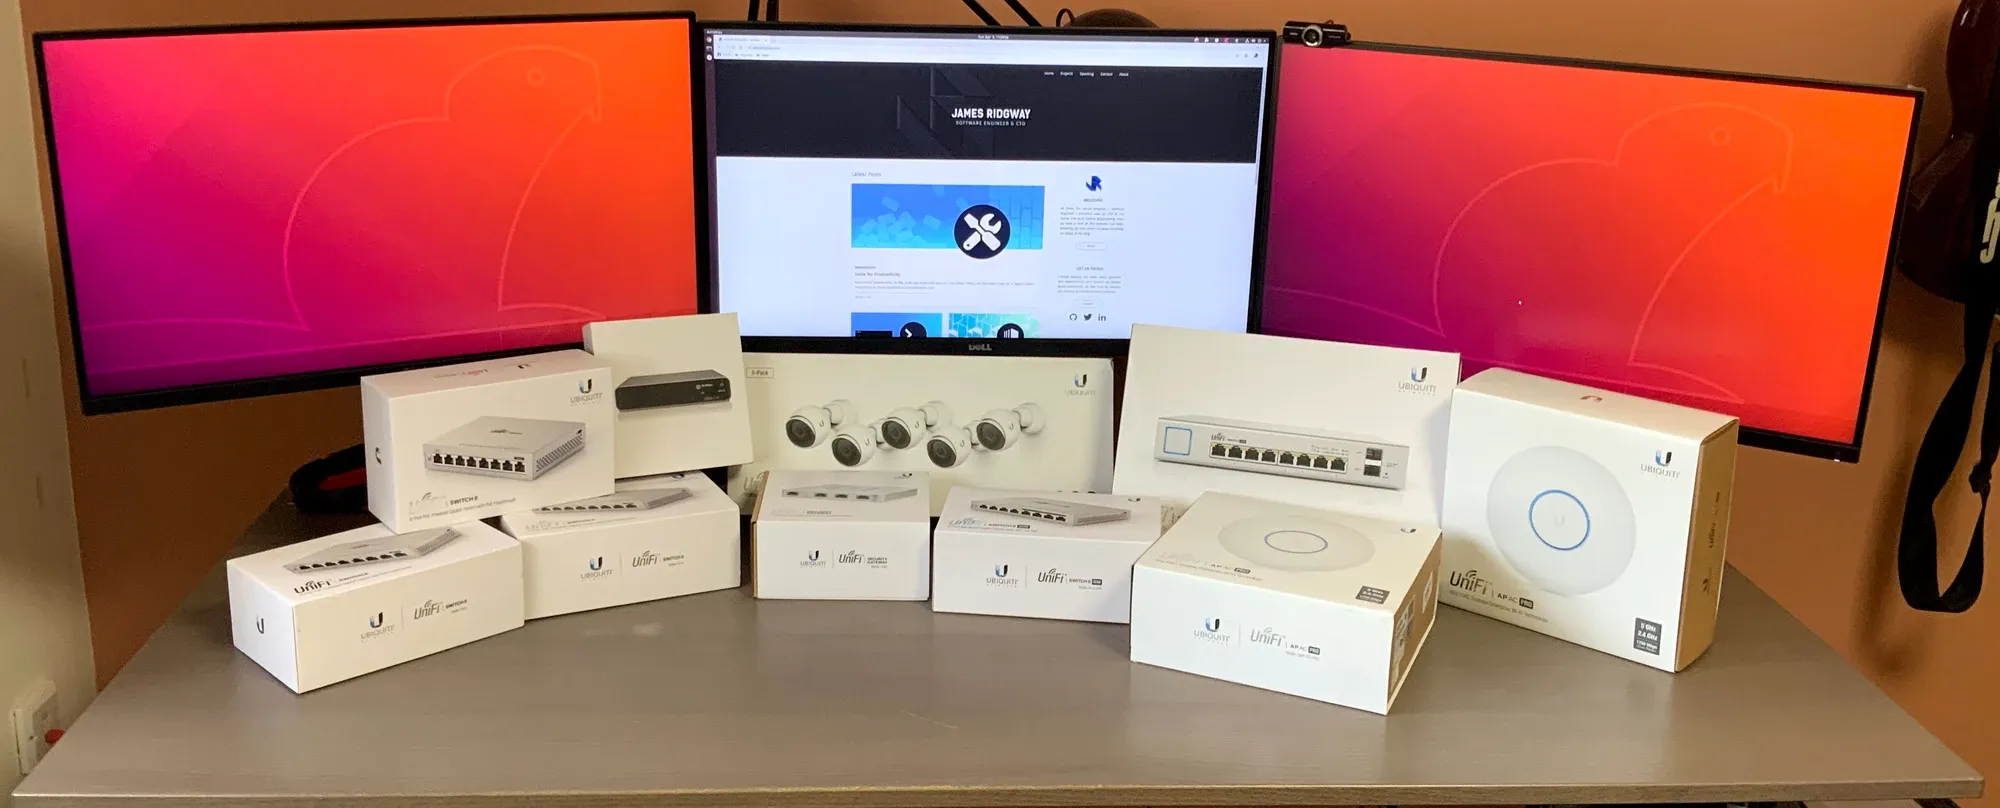
So here is what I ended up buying:
- 1x - UniFi Cloud Key Gen2 Plus
- 1x - UniFi Security Gateway
- 1x - Ubiquiti UniFi Switch 8 Port - US-8-60W
- 1x - Ubiquiti US-8-150W 150 W 8 Port UniFi PoE Switch
- 3x - Ubiquiti US-8 Port Managed Desktop Gigabit Switch (1 PoE Passthrough Port)
- 2x - UniFi AP AC PRO
- 1x - Ubiquiti UniFi Video Camera G3 5 Pack
Once everything arrived and network cable had been run round the house I was ready to set everything up.
Managed Network
All of these Ubiquiti devices are classified as managed devices. With any managed device you expect to be able to login to a system and administer how it's configured. And the great think about Ubiquiti is that the management of the devices is unified (UnFi/Unified – get it?) – it can all be managed from one place and there are a few ways to do this.
You can download their UniFi Network Controller and host this on a machine, or you can get a UniFi Cloud Key which contains the Network Controller software. I opted to get a Cloud Key, and the Gen2 Plus model doubles up as a Network Video Recorder (NVR) for the CCTV cameras.
Setting Up The Network Cabinet
When I originally started this project I planned to keep hold of the TP Link Archer VR600 and just use it as a modem, hoping that the issues I'd had with it would go away if I just used it as a modem. In the end, it was much easier just to get a straightforward modem which is where the DrayTek Vigor 130 comes in. This has worked great for my internet here in the UK which is typical Fibre To The Cabinet (FTTC) connection.
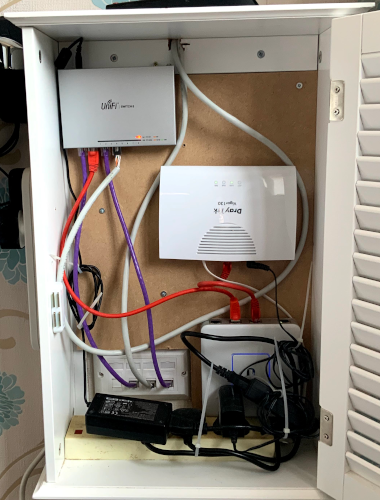
As you can see from the network cabinet picture, the initial network topology looks like this:
Internet  ->  Modem  ->  Security    ->  Switch  ->  Rest of the
                         Gateway                     nextwork
                         (via WAN1)
Cloud Key
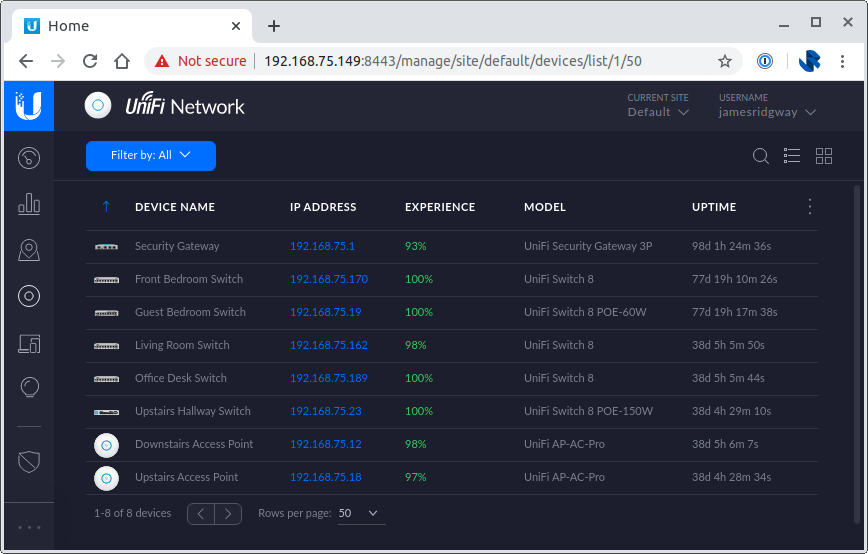
As devices are added to the network they need to be adopted by the Cloud Key or the UnFi Network Controller if you're self-hosting the controller software.
The adoption process is incredibly straightforward. The device will be listed in the Devices tab and you just click the adopt button. The adoption process ensures that the device is running the latest firmware and upgrades it if needed.
With all these devices I finally ended up with something that looked like this:
Network Configuration & WiFi
In the settings area of the Network Controller, you can configure everything relating to your network and the controller will take care of propagating any changes to the relevant Ubiquiti devices in your network.
In my new networking setup, I wanted a separate guest network to ensure that we can provide anyone who's visiting or staying with us access to the internet, without exposing everything on our network to their device. After all, you have no idea what malicious software your friends might have inadvertently installed on their phones.
VLANs
A VLAN or Virtual LAN is a virtual network that allows groups of devices to communicate on a physical network in a way that is completely isolated from any other Virtual LANs operating on the same physical network.
By default, a network will typically have one VLAN on which all devices will communicate without any restrictions imposed. To restrict guests to only accessing the internet I will be creating a separate Guest VLAN which will segregate them from the main network and all of my other devices.
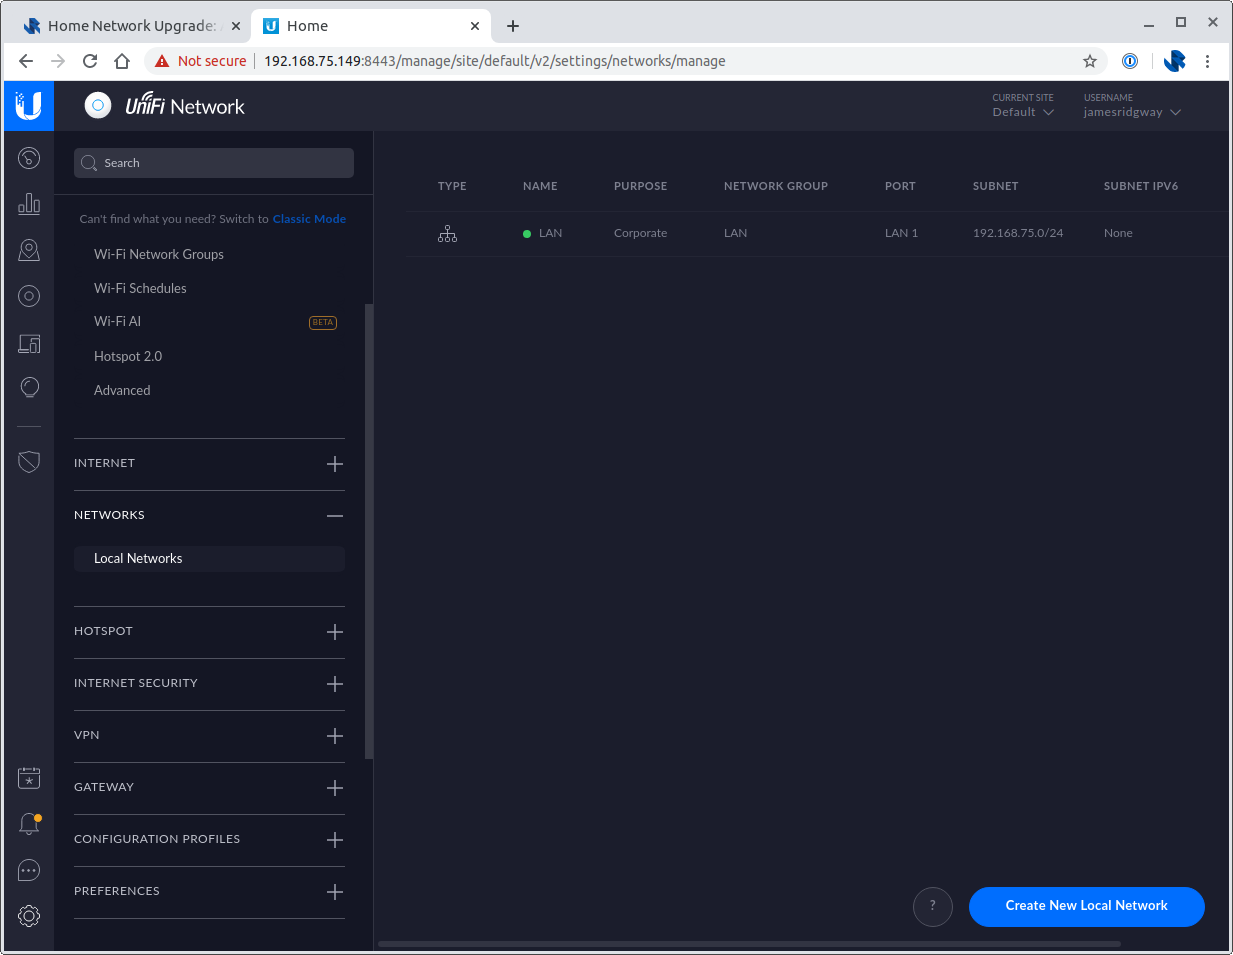
Under Settings > Networks > Local Networks we will use the option to Create New Local Network:
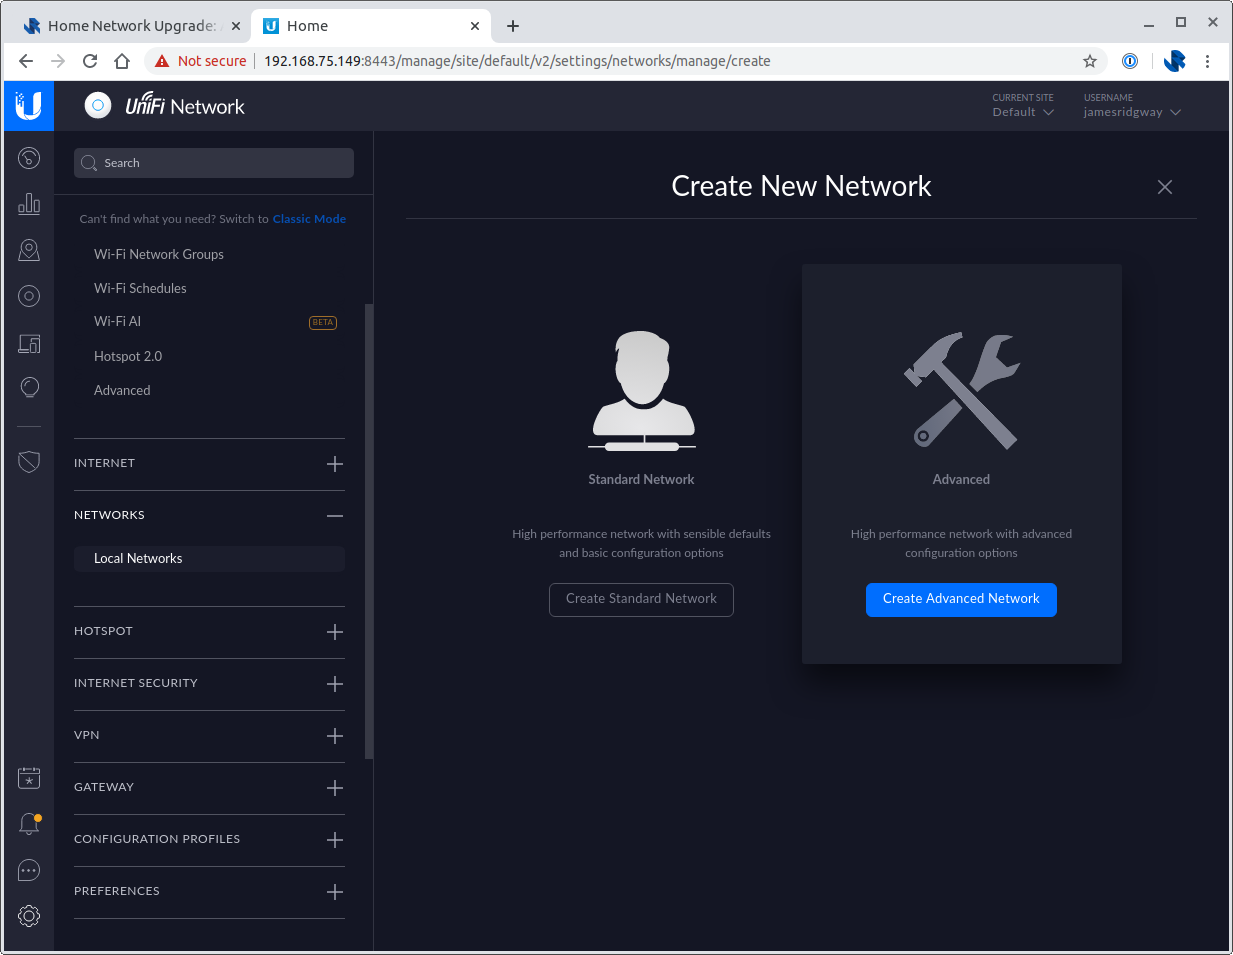
Pick Create Advance Network:
Configure the network:
- Network Name:
Guest - Network Purpose:
Guest - VLAN ID:
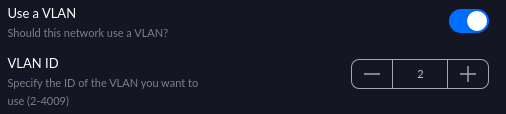
2
This needs to be different to the VLAN ID of your main network or any other network you may have created.
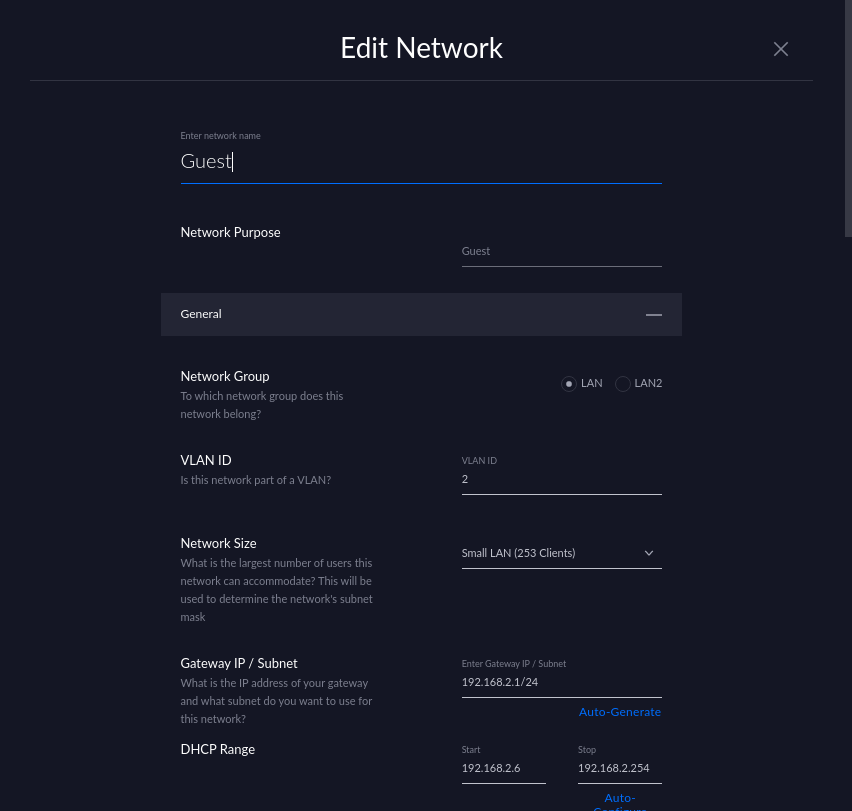
Everything else can be kept as default, click Done.
WiFi Networks
Go to Settings > Wi-Fi > Wi-Fi Networks.
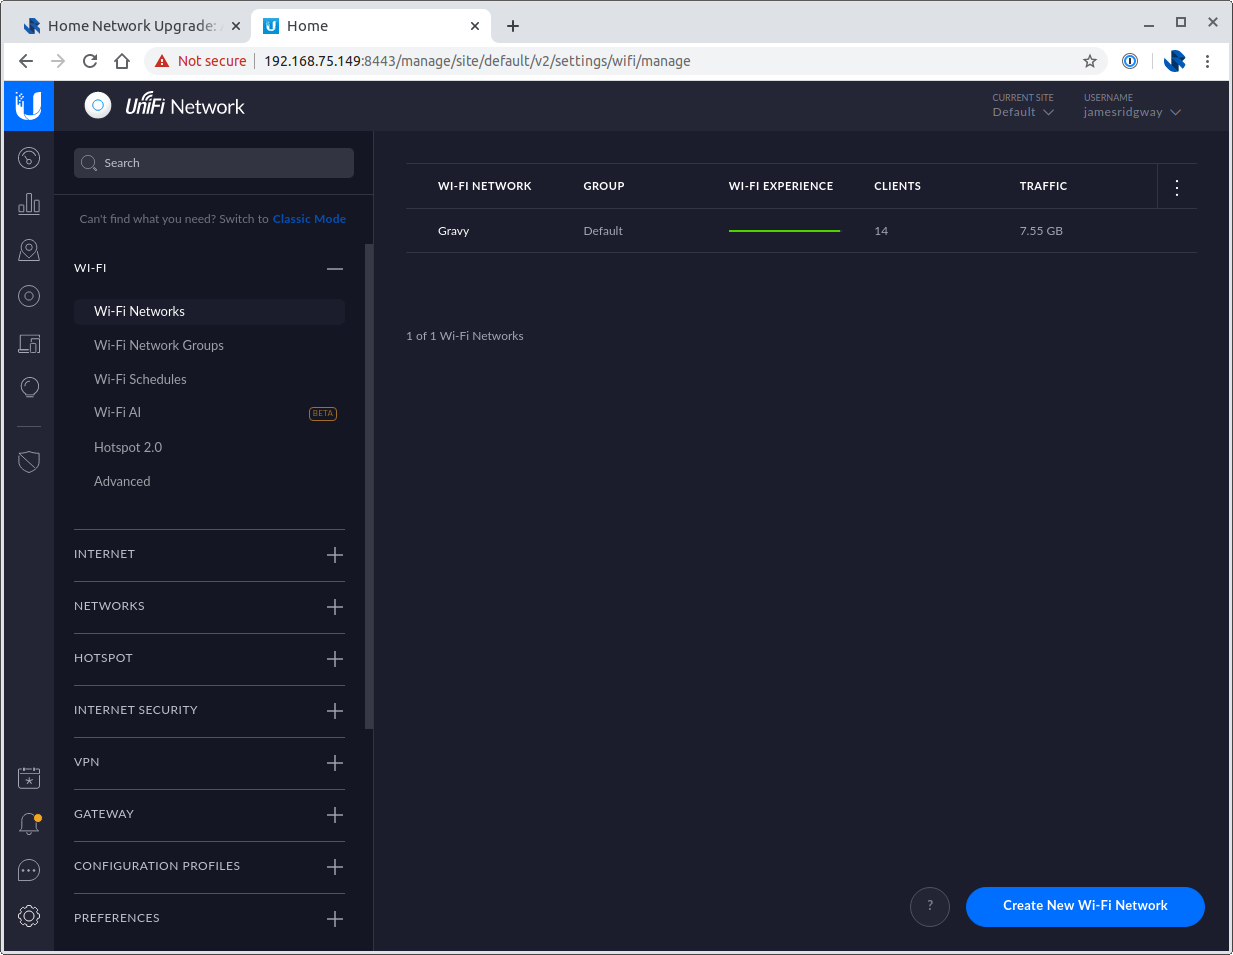
Create another WiFi network, using Create New Wi-Fi Network:
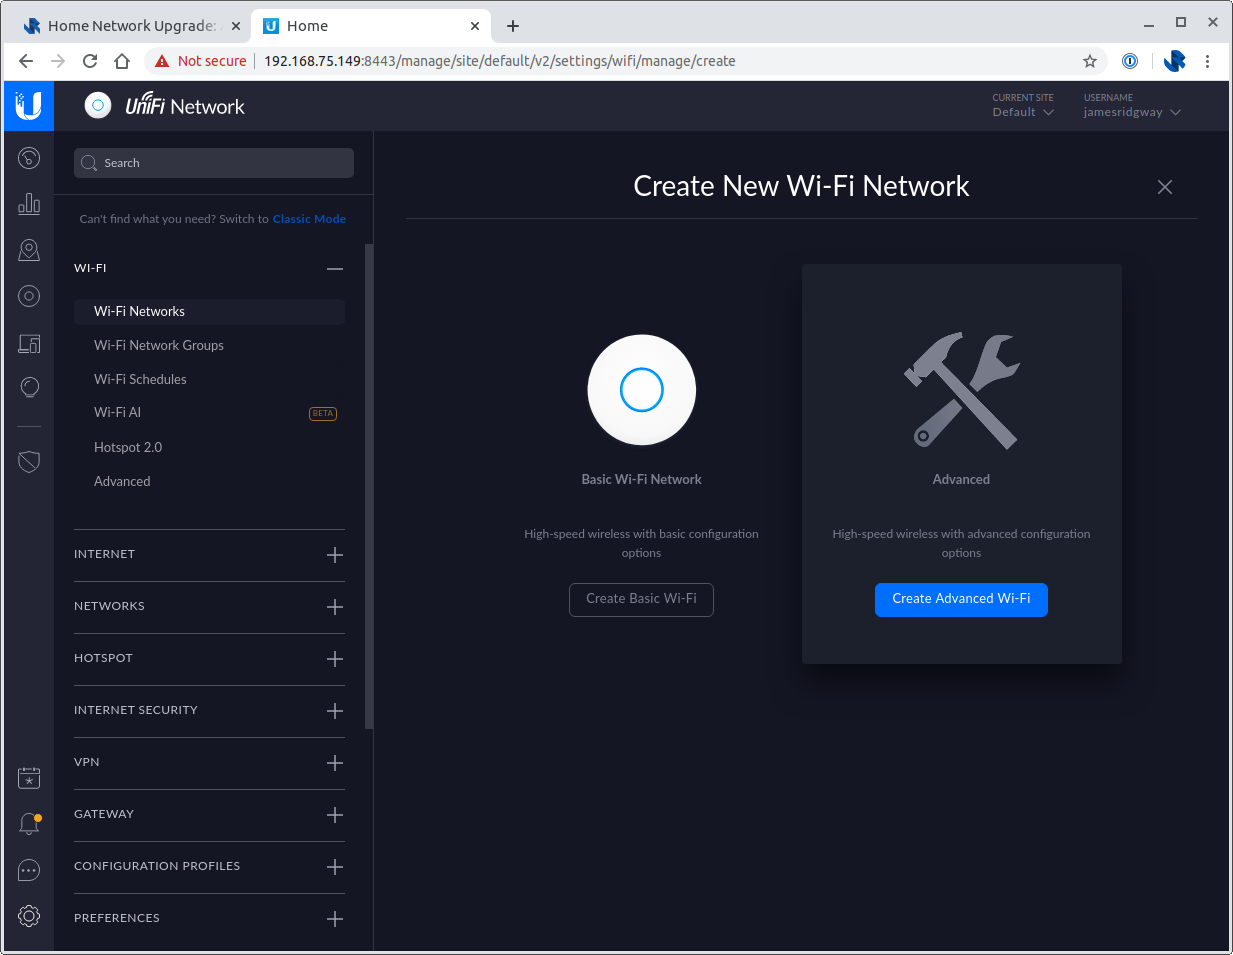
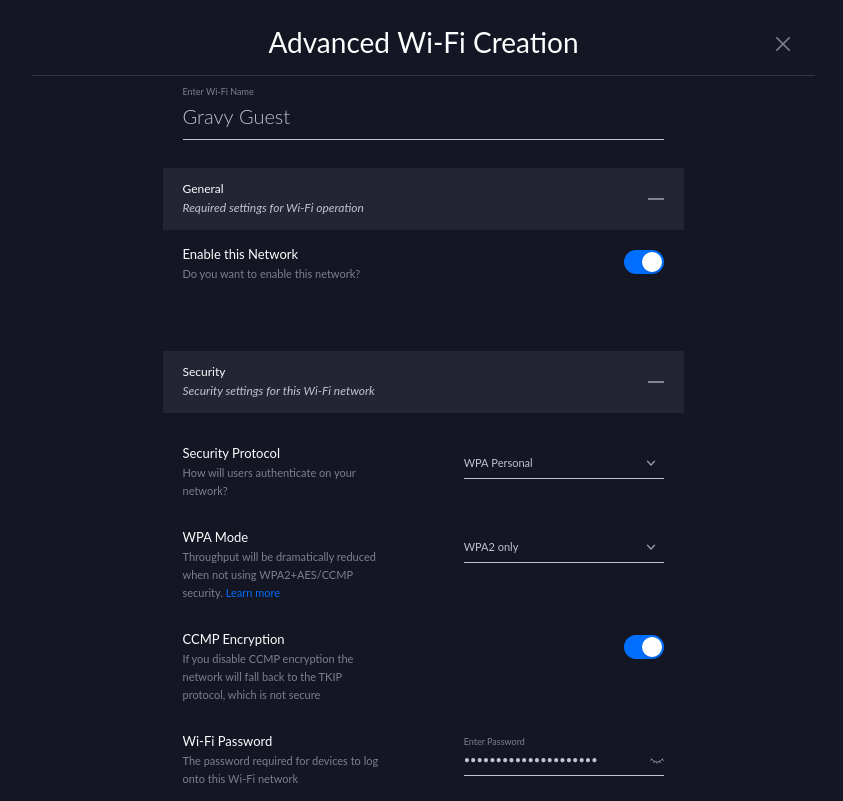
Configure your new WiFi network:
- Set a Wi-Fi Name
- Set a Wi-Fi Password
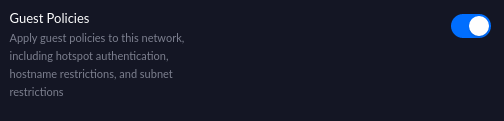
- Enable Guest Policies
- Use a VLAN and enter your VLAN ID
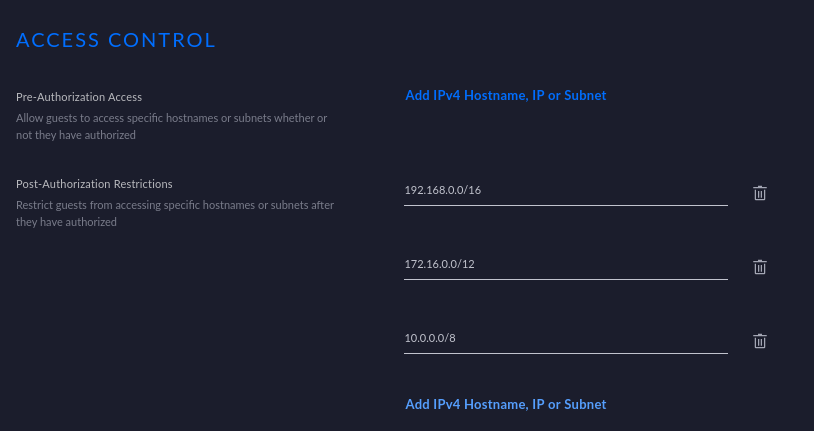
Finally, under Settings > Hotspot > Advanced you can check Post-Authorization Restrictions under Access Control. This should be set to restrict access to your main network. The default settings were sufficient to protect my network:
Conclusion
Switching out my existing network for my Ubiquiti setup has been a very straightforward process. The UniFi Network Controller for managing the devices is incredibly easy to use and is feature-rich in the range of settings and configuration that can be applied.

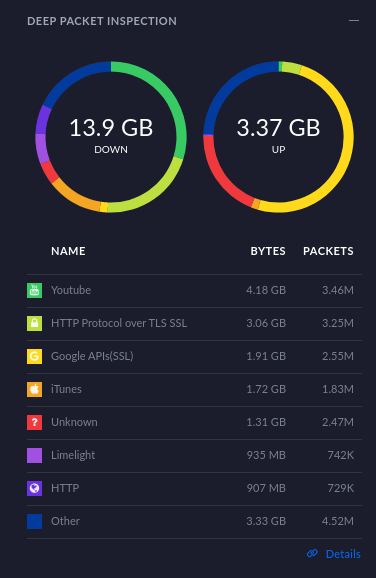
The Controller also provider a load of data and statistics on your overall network topology, WiFi performance and individual client devices.
At the start of this project it felt like I was taking on quite a risk by going all-in just based on what I'd read of other peoples experience. You could argue that I've massively over-engineered a home network, but I was so tired with battling with average consumer-grade hardware that I thought it was worth giving something more heavy duty a go. And now that I've been using this setup for several months without any issues this feels like the right choice!
